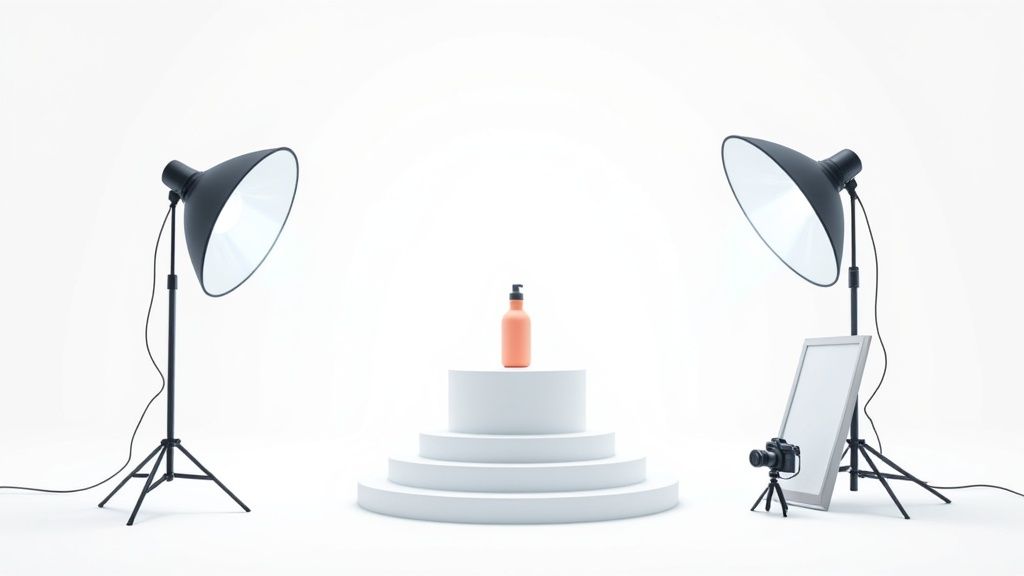
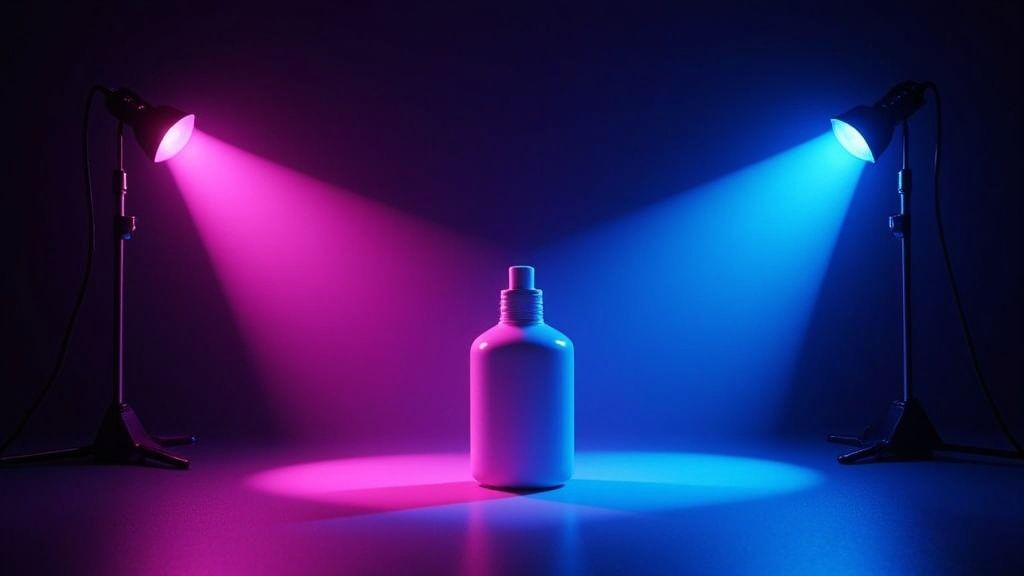
When it comes to a great product photography setup, it all boils down to one thing: controlling the light. Your goal is to get rid of harsh shadows and show your product exactly as it is in real life. This usually means using one to three artificial lights—like LEDs or strobes—and pairing them with modifiers like softboxes. This combination creates that soft, diffused light that perfectly flatters the product's shape and texture. It's truly less about having the most expensive gear and more about smart placement and modification.
Understanding the Fundamentals of Lighting
Before you spend a dime on equipment, you need to get a handle on why lighting is so critical. Good lighting isn't just about making a product visible. It's about shaping how people see it, creating a specific mood, and ultimately, building trust with your customers. The real difference between a quick snapshot and a professional, polished image almost always comes down to the deliberate control of light and shadow.
At its core, all light has a distinct quality, which we can describe as either hard or soft.
- Hard Light: This type of light creates sharp, clearly defined shadows with high contrast. Think about the direct sun on a cloudless day. While it can be fantastic for creating drama, it's often too harsh for product shots. It tends to hide important details and create distracting, glossy reflections.
- Soft Light: This is the opposite. It produces gentle, diffused shadows with smooth, gradual transitions—like the light on an overcast day. For 95% of product photography, soft light is what you're aiming for. It wraps beautifully around the product, minimizes glare, and brings out texture without creating any harsh lines.
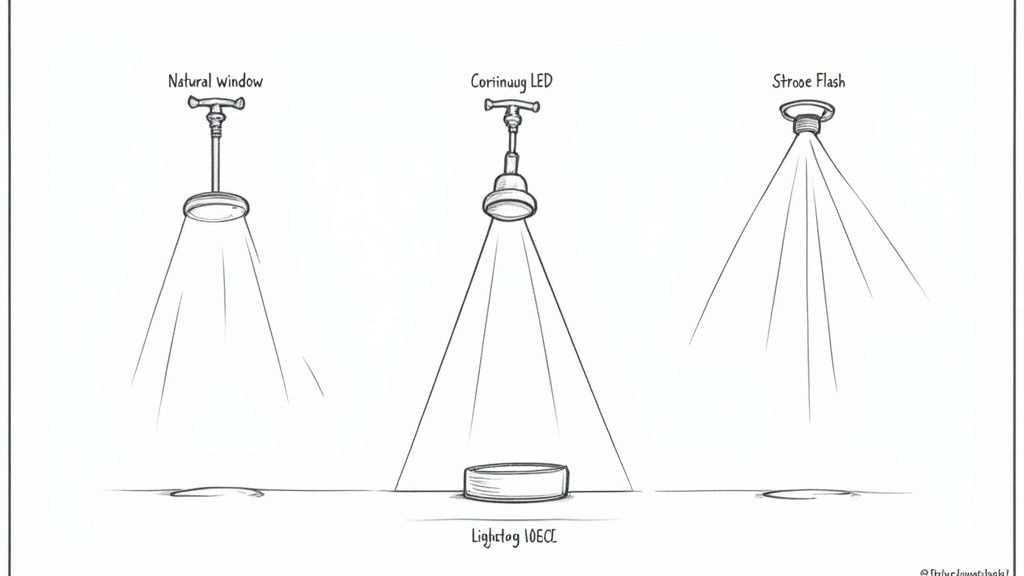
To give you a quick reference, here's how different light sources stack up for product photography.
Comparing Lighting Options for Product Photography
This table breaks down the most common lighting sources you'll encounter, helping you decide which is the right fit for your budget and goals.
Each option has its place, but for most e-commerce work, a good set of LED panels or studio strobes will give you the control and consistency you need to produce professional results every single time.
The Three Roles of Light
In a professional studio, lights aren't just placed randomly; each one serves a specific purpose. While you won't always need a three-light setup, understanding these roles is the key to troubleshooting any lighting challenge that comes your way.
- Key Light: This is your primary light source, and it's usually the brightest one in your setup. It does the heavy lifting, providing the main illumination for your product and defining the overall look and feel of the image.
- Fill Light: Positioned on the opposite side of the key light, the fill light's job is to "fill in" the shadows created by your main light. It’s always less powerful than the key, which ensures you keep some dimension and depth instead of creating a flat, shadowless photo.
- Backlight (or Rim Light): This one goes behind the product, often pointing toward it or the background. Its role is to separate your product from what's behind it. It creates a subtle, bright outline—a "rim"—around the edges of your item, adding a sense of depth that makes it pop off the screen.
Think of these three roles not as a strict recipe but as a toolkit. Sometimes, you might just use a single key light and a simple white reflector card to act as your fill. The end goal is always the same: to sculpt the product with light, making it look just as appealing on screen as it does in person.
To really get your product photography to the next level, a solid grasp of general lighting principles is a must. You can learn more about essential lighting techniques for photography that apply across all kinds of genres. This foundational knowledge is what will empower you to adapt and improvise, no matter what you're shooting. By understanding these fundamentals, you stop just taking pictures and start strategically crafting images that actually sell.
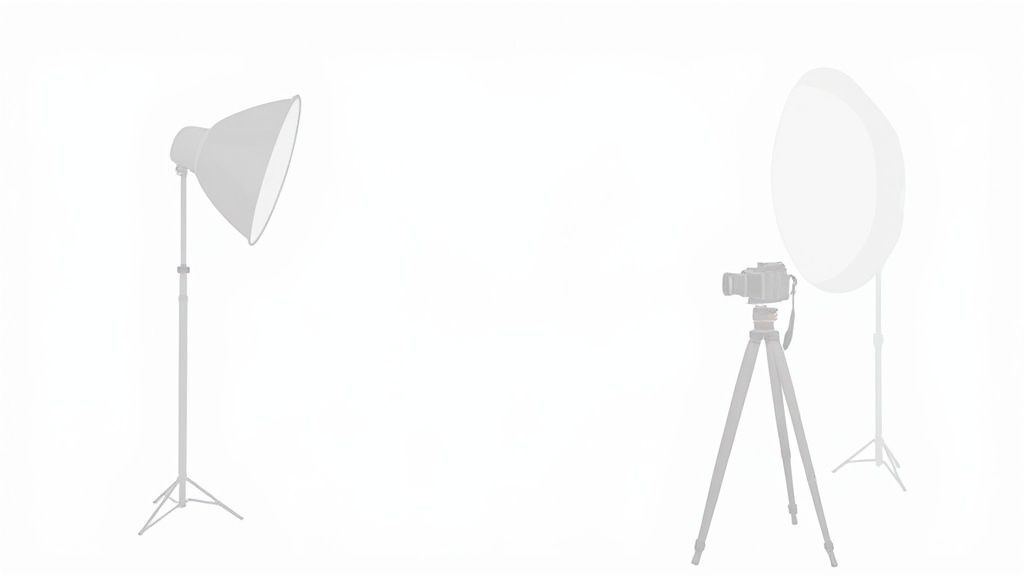
Assembling Your Essential Lighting Kit
Getting your first product photography lighting setup together can feel like a massive undertaking, but it really doesn't need to drain your wallet. The trick is to focus on gear that gives you control and consistency, not just fancy brand names. The goal here is to build a solid, core kit that delivers professional-quality light no matter what product you're shooting.
Your first big decision comes down to the primary light source. The classic debate is continuous lights (which stay on) versus strobes (which flash). While strobes pack a serious punch in terms of power, they come with a steeper learning curve—you can’t actually see what the light is doing until you’ve already taken the shot.
This is why most people just starting out find continuous lighting to be way more intuitive. What you see through the camera’s viewfinder is exactly what you get. This makes tweaking your setup and seeing the results in real-time incredibly simple and efficient.
Continuous Lights vs. Strobes: A Quick Comparison
Knowing the core differences will help you put your money where it matters most. Each type of light has its own strengths, and the right choice for you will depend on your workflow, budget, and the kinds of products you’ll be shooting.
Because they're so easy to work with, modern LED continuous lights are my top recommendation for most e-commerce businesses. The technology has come a long way; today's LEDs are incredibly bright, have fantastic color accuracy, and run cool without guzzling power.
This trend is actually reshaping the entire industry. By 2026, LED systems are projected to capture more than 50% of the photography lighting market, thanks to their efficiency and quality. For product photography, this is huge. LEDs give you that consistent, controllable light with adjustable color temperatures, which is critical for making sure your product colors look true-to-life. You can dig into more of the data behind this shift in this detailed industry forecast.
Shaping Your Light with Modifiers
A bare bulb throws harsh, unflattering light—the exact opposite of what you want for a professional product photo. This is where light modifiers become your best friends. These are essential tools you attach to your light to soften, diffuse, and shape its output, creating that clean, high-end look.
You've got a few go-to options to start with:
- Softboxes: These are the true workhorses of product photography. A softbox is basically an enclosure with a white diffusion panel on the front that produces a beautiful, soft, yet directional light that you can aim with precision. If you buy one modifier, make it a large softbox.
- Umbrellas: Photography umbrellas work just like you'd imagine. You can either shoot light through a white translucent one for soft, broad light, or bounce light off a silver or gold reflective one for a punchier, more focused beam. They’re cheap, portable, and dead simple to set up.
Here’s a core principle of lighting: the larger the light source is relative to your product, the softer the light will be. This is why a big softbox placed close to a small item creates those beautiful, gentle shadows you see in top-tier catalogs.
Essential Support Gear You Can’t Skip
Your lights and modifiers won't do you much good if they're lying on the floor. Don't skimp on the support gear—it provides the stability and flexibility you need to position everything just right.
1. Light Stands
You’ll need at least one sturdy light stand for every light you own. Look for stands that can extend high enough for your needs and have a wide base so they don't topple over easily. It’s tempting to grab the cheapest one you can find, but spending a little more on a quality stand will save you from costly accidents down the road.
2. Reflectors
A simple reflector is one of the most powerful and affordable tools you can have. A basic 5-in-1 reflector (which typically has white, black, silver, gold, and translucent surfaces) can easily do the job of a second light. Use the white side to gently bounce light back into the shadows, the black side to absorb light and deepen contrast, and the silver side for a bright, specular fill light.
By putting together these key pieces—a solid LED light, a large softbox, a reliable stand, and a versatile reflector—you’ll have a complete and flexible lighting kit. This foundational setup is all you really need to start creating clean, beautifully lit product images. To see these tools in action and learn more, check out our guide on how to take good product shots.
Getting Hands-On With Classic One, Two, and Three-Light Setups
Alright, you've got the gear. Now it's time to actually use it. If you can get a handle on a few foundational lighting setups, you'll be ready for pretty much any product that comes your way. We're going to start simple with a single light and build our way up to the classic three-point arrangement. Each step adds another layer of control, letting you dial in the exact look and feel your product deserves.
Before we dive in, this quick visual breaks down the core decisions you’ll be making every time you set up your lights.

As you can see, it really boils down to three things: picking your light, softening it with a modifier, and putting it in the right spot. Get those right, and you're well on your way to professional-quality images.
Mastering the One-Light Setup
Never underestimate what you can accomplish with a single light. Seriously. When you pair one light with a simple reflector, you can create stunning images with plenty of depth and dimension. It's the perfect place for a beginner to start and a setup even seasoned pros rely on for its elegant simplicity.
Here's how to pull it off:
- Set Your Key Light: Place your main light, fitted with a softbox or umbrella, at about a 45-degree angle to your product. This is the bread-and-butter position for a reason—it carves out the product's shape with a natural-looking blend of light and shadow.
- Bring in a Reflector: On the opposite side of the product, set up a white foam board or a 5-in-1 reflector. Its only job is to catch the light from your main source and bounce it back into the shadows, softening them up. You can fine-tune this by moving the reflector closer for less shadow or farther away for more dramatic contrast.
This approach is fantastic for products with rich textures, like a chunky hand-knit blanket or a piece of rustic wooden furniture. The shadows help define the material and give it a tangible quality. The real beauty here is its efficiency—you're getting a two-light look with half the equipment.
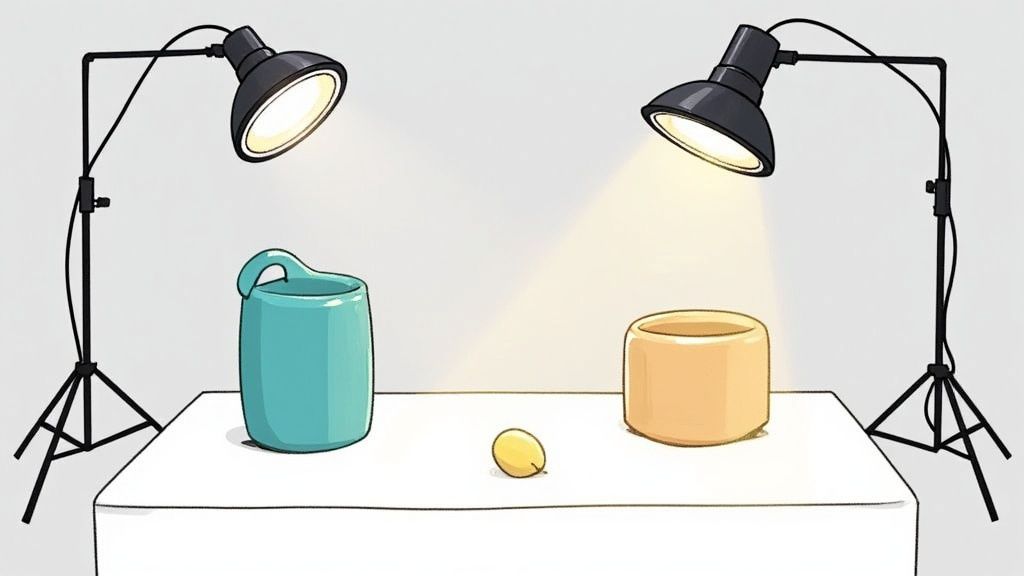
Building a Classic Two-Light Setup
When you need a bit more finesse and control over your shadows, adding a second light is the way to go. This introduces a dedicated fill light, which gives you precise command over the image's contrast. It's a go-to for e-commerce shots where absolute clarity is king.
For this setup, you’re working with a key light and a fill light.
- Key Light: This is still your main light, positioned at that familiar 45-degree angle. It sets the primary direction of the light and creates the main shadows.
- Fill Light: Your second light goes on the opposite side, also at roughly a 45-degree angle. Its purpose is to gently fill in the shadows created by the key light.
The golden rule for a two-light setup is this: your fill light must always be less powerful than your key light. If they're at equal strength, you'll cancel out all the shadows and end up with a flat, lifeless photo. A good rule of thumb is to set your fill light to half the power of your key and adjust from there.
This two-point lighting is perfect for products where every last detail needs to be seen clearly—think electronics with lots of buttons and ports or skincare bottles with fine-print labels. It delivers that clean, polished look you see all over Amazon and major online catalogs.
Constructing the Full Three-Point Lighting Setup
The three-point lighting setup is the undisputed champion of studio photography. It gives you the ultimate control. By adding a third light behind the product, you can literally lift it off the background, creating a polished, three-dimensional look that just screams professional.
This setup uses your key and fill lights, plus one more critical addition: the backlight.
- Key Light: Your main light source, still at a 45-degree angle.
- Fill Light: Opposite the key, set to a lower power to soften shadows.
- Backlight: This light (sometimes called a rim or hair light) is positioned behind the product. You might place it overhead on a boom stand or directly behind the subject, just out of the camera's view, aiming it at the back edges of the product.
This backlight traces a subtle, bright outline around your product. This effect, known as a rim light, is what creates that crisp separation from the background. It’s especially powerful for defining dark products on dark backdrops or for adding a gorgeous glow to glassware.
Imagine shooting a high-end bottle of whiskey. The key and fill lights illuminate the label, while the backlight shines through the bottle, making the amber liquid glow and highlighting the bottle's elegant shape. That's the kind of finishing touch that takes a photo from good to truly exceptional.
Lighting Techniques for Reflective and Tricky Products
Photographing anything with a shiny surface—jewelry, glassware, chrome, electronics—can feel like you’re fighting a losing battle with reflections. Suddenly, your camera, your lights, and even you are making a cameo on the product. But here’s the secret: the goal isn’t to kill all reflections. It's to control what the product reflects.
Instead of fighting them, you want to create large, soft, clean reflections that actually define the product’s shape without creating ugly, distracting glare. Think of it this way: a small, hard light source creates a small, hard hotspot. But a massive, soft light source creates a broad, gentle highlight that beautifully wraps around the item.
Taming Reflections with Large Diffusers
Your absolute best friend for shooting reflective products is a big diffusion panel or a massive softbox. By placing a large sheet of white, translucent material between your light and the product, you instantly transform that small light into a huge, soft source. This creates a big, beautiful highlight that sculpts the product's form.
Take a glossy black bottle, for example. Point a bare light at it, and you'll get a nasty, starburst-like glare. But place a large diffusion panel next to it and light the panel from behind, and the bottle will reflect a clean, white rectangle. This reflection acts like a contour line, elegantly tracing the bottle's curve and giving it that polished, professional look.
You have a few options to get this effect:
- Large Softboxes: An octabox or a big rectangular softbox placed right up close to the product will create gorgeous, soft highlights.
- Diffusion Panels: These are just frames with translucent fabric stretched over them. They give you a ton of flexibility since you can position them independently from your light source.
- DIY Solutions: Don't underestimate the power of a large white sheet or even a frosted shower curtain clamped to a stand. In a pinch, they can work wonders to diffuse your light.
The key is managing the highlights and reflections. The goal isn't to completely eliminate them, because a product with no highlights will look fake and boring. They need to be reigned in to make a compelling photo.
The Art of Gradient and Backlighting
For metallic or cylindrical objects like a chrome cocktail shaker, a simple highlight might not cut it. This is where gradient lighting comes in. By positioning your diffused light source to create a reflection that fades from light to dark across the surface, you create a powerful sense of 3D shape and volume. It’s what makes metal look metallic.
Backlighting is another killer technique, especially for anything transparent like glassware or bottles filled with liquid. Placing a light behind the subject—often aimed at a white background—can make the product literally glow from within. It’s the perfect way to show off the rich color of a beverage or the intricate cuts in a crystal glass, making the product look luminous and irresistible.
The need for specialized gear to pull off these advanced setups is a huge driver in the industry. The global photography lighting equipment market was valued at around USD 5.15 billion in 2024 and is projected to hit USD 7.80 billion by 2033. This growth is all about photographers needing the right tools to tackle challenging shoots. You can dig into the numbers in this detailed industry report.
Creating a Light Tent for Maximum Control
For the most extreme cases—think a silver necklace or a mirrored Christmas ornament—even a large diffuser might not be enough to hide the entire room's reflection. When you need total control, it's time to build a light tent. This just means surrounding the product almost completely with white surfaces, leaving just a tiny hole for your camera lens to peek through.
You can buy ready-made light tents, but making your own is surprisingly easy.
- Build a Box: Use white foam core boards to create a three-walled box around your product, which should be sitting on a white surface.
- Add a Roof: Place another piece of foam core on top.
- Light from the Outside: Now, shine your lights through the foam core or bounce them off the white interior surfaces.
The product is now living in a world of pure, soft white, so its surface reflects only clean, unbroken light. This is the ultimate move for that seamless, catalog-perfect look you see with high-end jewelry and chrome. Your entire product photography lighting setup essentially becomes the environment itself.
Syncing Camera Settings With Your Lighting
A fantastic lighting setup can fall flat if your camera isn't speaking the same language as your lights. I like to think of camera settings as the bridge between the light you’ve painstakingly created and the final image you capture. Getting them right is absolutely non-negotiable for sharp, color-accurate, and professional photos that actually build trust with your customers.
First things first: switch your camera to Manual Mode (M). This is where you take full control. Automatic settings are fine for everyday snapshots, but they just don't have the precision needed for a controlled studio environment. Manual Mode lets you call the shots on aperture, shutter speed, and ISO, ensuring your creative decisions—not some algorithm—dictate the final look.
Setting The Foundation With ISO And Aperture
In a controlled lighting setup, the goal is always to capture the cleanest, sharpest image possible. That journey starts by setting your ISO to its lowest native setting, which is usually 100 or 200. Keeping the ISO low is key to minimizing digital noise (that grainy texture), which results in crisp, smooth details that do your product justice. Since you’re in complete control of your artificial lights, there's zero need to crank up the ISO to compensate for darkness.
Next up is your aperture (or f-stop). This setting controls the depth of field—basically, how much of your image is in sharp focus from front to back. For most e-commerce shots, you want the entire product to be tack-sharp.
- A narrow aperture (a higher f-number like f/8, f/11, or even f/16) gives you a deep depth of field, keeping everything in focus. This is your go-to for standard product photography.
- A wide aperture (a lower f-number like f/2.8 or f/4) creates a shallow depth of field, which blurs the background. This is better for more creative, lifestyle-type shots where you want to draw the eye to a specific detail.
For a classic product-on-white shot, starting at f/11 is a fantastic baseline. It gives you enough depth of field for most small to medium-sized products without forcing you to sacrifice too much light or sharpness.
Nailing Shutter Speed And White Balance
With your aperture and ISO locked in, shutter speed is now your main tool for dialing in the perfect exposure. When working with continuous lights, a faster shutter speed lets in less light (darkening the image), while a slower one lets in more (brightening it). Because your product is stationary on a tripod, you have the freedom to use whatever shutter speed you need to get the job done—1/125s is a common starting point.
Finally, and this is a big one, you have to nail the white balance. This is what ensures the colors in your photo are an exact match to the real-life product. Getting this wrong is a surefire way to increase customer returns. While it’s tempting to leave it on "Auto White Balance," it's notoriously unreliable under studio lights.
The truly professional method is to set a custom white balance using a simple grey card.
- Place the grey card in your scene, making sure it’s lit by your main light source.
- Take a photo of the card, filling up most of the frame.
- Dive into your camera’s menu and use that photo to set the custom white balance.
This one simple step tells your camera exactly what "neutral grey" looks like under your specific lights, ensuring every other color is rendered with perfect accuracy. Staying up-to-date with your gear is also important; check out the advancements in mirrorless camera technology to see how new features can make this even easier. And after your shoot, don't forget that image compression is crucial for web performance. For more on that, read our SEO image optimizer guide to transform website performance.
Common Product Lighting Questions Answered
Even when you have a solid plan, questions always come up as you start dialing in your lighting. Let's tackle some of the most common hurdles photographers face, with straightforward answers to help you solve problems on the fly and refine your technique.
Can I Use Natural Light for Product Photography?
Absolutely. But you need to know what you’re getting into. The soft, diffused light from a big window can be gorgeous, and you can't beat the price—it's free. This makes it a fantastic starting point if you're working with a tight budget.
The biggest challenge? It’s completely inconsistent. Daylight changes minute by minute, shifting in both brightness and color. If you're shooting an entire e-commerce catalog and need every shot to match, that unpredictability is a massive headache. This is where artificial light shines, giving you total control and repeatable results every time.
If you are going to use natural light, try to shoot at the same time every day and hang a sheer curtain over the window to act as a diffuser. A simple reflector will also be your best friend for bouncing light back into any harsh shadows.
What Is the First Piece of Lighting Gear I Should Buy?
If you can only spring for one thing right now, make it a quality LED continuous light with a large softbox. This combo is the undisputed workhorse of any effective product photography lighting setup.
A single, big, diffused light source is incredibly versatile. You can position it as your main light and then use a cheap white foam board on the opposite side as a reflector. Just like that, you’ve created a two-light effect with only one light. This simple duo gives you complete command over the light's direction and quality—the true foundation of professional product photography.
Plus, LEDs are perfect for beginners because what you see is what you get. There's no guesswork like there is with flash or strobes.
The larger the light source is relative to your subject, the softer the light will be. This single principle is why a big softbox placed close to a small product creates those gentle, flattering shadows you see in professional catalogs.
How Do I Stop Reflections in Shiny Products?
Dealing with reflections on shiny objects is all about controlling what the product’s surface "sees." Instead of pointing a light at the product, you need to bounce light off large, white surfaces around it, like foam boards or diffusion panels.
This technique wraps the item in a broad, soft light, which creates clean, defining highlights instead of those distracting, mirror-like glares. The goal isn't to kill reflections entirely—that would make the product look flat and unnatural. You want to manage them so they beautifully define the object's form.
For hyper-reflective things like chrome or jewelry, you might need to build a "light tent" by surrounding the product with white material, leaving just a tiny opening for your camera lens to peek through.
Why Does Color Temperature Matter for Product Photos?
Color temperature, measured in Kelvin (K), is just a way of describing how warm (yellow) or cool (blue) a light source is. It’s absolutely critical in product photography because it dictates the color accuracy of your images. Getting color right builds customer trust and, just as importantly, reduces returns.
For instance, daylight is quite cool (around 5500K), while a standard indoor lightbulb is very warm (around 3200K). If you mix these different light sources in one shot, you’ll get a bizarre color cast that’s a nightmare to fix in editing.
The pro move is to make sure all your lights have the same color temperature and then set your camera’s white balance to match it perfectly.
At ECORN, we know that exceptional product presentation is the cornerstone of e-commerce success. If you're ready to elevate your Shopify store with stunning design and optimized performance, explore our flexible subscription packages. Get in touch with our Shopify specialists today.


Shopify: How to Reduce Technical Debt

Shopify UX Design Change: A Playbook for Growth

User Generated Content Strategy: Shopify Playbook

Shopify Pause and Build Plan Cost: A Complete 2026 Guide

Compare at Price on Shopify: A Complete Guide for 2026

Where Can I Sell My Prints? 10 Best Platforms for 2026

Shopify Order Management System: The Ultimate Guide 2026

What Is Marketing Attribution? an eCommerce Guide for 2026

10 Best Black Friday Sales Sheets for 2026

Discover the Top Social Media Marketing Agencies For

Consumer Confidence Definition for eCommerce in 2026

What Is Social Commerce? Your 2026 Guide to Boosting Sales

A Social Ad Campaign Playbook for eCommerce Growth

7 Best FAQ Page Examples for SaaS & eCommerce

Market Research in Fashion Industry: A Guide for Shopify

Shopify Migration Services: Expert Guide for 2026

Mastering FB Retargeting Ads for Shopify in 2026

What Is Omnichannel Ecommerce

Master Your Shopify Plus Migration: The 2026 Guide

Shopify Integration Services: A Merchant's 2026 Guide

Shopify Collection Description: A Guide to SEO & Sales

Shopify Plus Contact: Reach Sales & Support Effectively

Top Luxury Shopify Stores: Design & UX Strategies

How to Improve Customer Experience: A Shopify Roadmap

Creative Facebook Ads: 10 Examples for Shopify Brands

Remarketing with Facebook Ads: A Shopify Guide for 2026

SEO Linking Strategies for Shopify Stores

Top 7 Statistics YouTube Channels for eCommerce in 2026

Hiring Shopify Plus Designers: A Founder's Guide

Shopify Product Variation: Master Your Variants for 2026

Leverage Ai Solutions Brands: Your 2026 Shopify Growth Guide
Filters in Shopify: A Guide for Growing Brands

Shopify Plus Developer: A Guide for Growing Brands

When Does Black Friday Online Start? A 2026 Guide
Black Friday Email Marketing: Shopify & Klaviyo Guide

Polaris Design System: The Complete Shopify Guide

How to Hire a Consultant Email Marketing Expert

What Is Q4? A Shopify Merchant's Guide to Peak Season

Marketing Organization Structure for eCommerce Growth

Top Account-Based Marketing Agency Guide for 2026

7 Remarketing Ad Examples for Your 2026 Campaigns

AI Retail Solutions: Boost Your Shopify Store

Migrate to Shopify: The Definitive 2026 Guide

Shopify Authentication App: A Guide for Secure Stores

Why Strategic Marketing Is Important for Growth in 2026

How to Create a Size Chart in Shopify: 2026 Guide

Shopify Themes for Jewelry: The Definitive 2026 Guide

Minimal Shopify Templates: Faster, Higher-Converting Stores

Maximize Profit: Shopify CC Fees 2026 Guide

Best Shopify Apps for Beginners in 2026

How to Improve Online Shopping Experience in 2026

Shopify Design and Development Services: A 2026 Guide

Small Business Social Media Marketing Agency: A Hiring Guide

Bulk Edit Shopify: A Guide to Save Hours on Store Updates

2026 Trends in Food and Beverage Industry

Post Purchase Survey Guide for Shopify Stores

How to Build an Ecommerce Brand in 2026

Conversion Rate Optimization for Ecommerce: Maximize Profit

How to Use Customer Data to Increase Sales: A Guide

Shopify for Enterprise: The 2026 Deep Dive Guide

Email Marketing Agencies: The Guide for Shopify Brands

Boost Sales With The Right Shipping Shopify App

Your Guide to the Shopify Site Map

7 Headless Commerce Examples for 2026

Mastering Trends in Cosmetic Industry for 2026

Transfer Shopify to BigCommerce The Complete 2026 Playbook

What Is Shopify Collective? Your 2026 Guide to Success

Unlock Shopify Growth with Site Link SEO

Integrating Shopify and WordPress A Complete Guide for 2026

Naming a Clothing Store: A Shopify Founder's Playbook

Guide to buying shopify store in 2026

Buying shopify store: Buying a Shopify Store: Invest Wisely

Food & Beverage Marketing: A Complete Guide for 2026

Facebook Ads Agency: A Shopify Brand's Hiring Guide

Shopify Apparel Stores: A 2026 Launch & Scale Guide

How to Deactivate Shopify Store: The 2026 Guide

Shopify and Square: The 2026 Ultimate Comparison

Your Guide to Beauty Products Ecommerce

A Guide to Marketing for Beauty Brands in 2026
Your Guide to Facebook Black Friday Ads

Facebook Ad Ecommerce for Shopify Growth

Iconography Web Design The Definitive Guide for Shopify Stores

A Modern Backlinks SEO Strategy for Shopify Stores

How to Launch an Online Store: A Step-by-Step Success Guide

Optimize Shopify Store: Master Performance in 2026

Successful Migration for Shopify: Protect SEO & Grow

Maximize Traffic & Sales: Get Your Free Website Audit Report

Master the Best Ads Facebook Formats for eCommerce Success

How to Find the Best Ecommerce Agency Near Me in 2026

10 Crucial White Hat Techniques SEO for Shopify in 2026

How to Reduce Returns and Boost Profits in Your eCommerce Store

What Is Ecommerce Personalization A Guide to Unlocking Growth

Payment gateways in shopify: The Ultimate Guide for Merchants 2026

Fulfillment services for shopify: Scale Your Ecommerce Brand

Shopify Landing Page Examples: 7 Winning Templates to Boost Conversions

How to Create Urgency in Sales on Shopify

The Best Review Apps for Shopify to Drive Growth in 2026

The Best Ecommerce Platform for Startups in 2026

Choosing Ecommerce Website Design Packages A Complete Guide

Shopify Plus Partners: Guide to shopify plus partners for 2026 growth


newsletter in your inbox