
Getting your Shopify shipping set up boils down to three key things: creating shipping zones for different regions, adding your shipping rates (like flat-rate or free), and picking your carriers or local delivery methods. Nailing these settings is the foundation for a smooth checkout that keeps customers from walking away.
Why Your Shipping Strategy Is More Than Just Logistics
Before we get into the nuts and bolts, let's talk about why your shipping setup is a massive sales tool, not just a logistical headache. How you handle shipping directly shapes customer trust, how many people actually buy from you, and your store's bottom line. A poorly planned strategy creates confusion and lost sales, but a smart one can give you a serious edge.
The biggest reason people bail on their online shopping carts isn't the price of the product itself—it's the surprise costs that pop up at the very end.
Shipping costs are the number one killer of conversions. Industry data shows that nearly 70% of online shopping carts are abandoned across the globe. A staggering 48% of those are ditched because extra costs, like shipping, were just too high. If you want to dive deeper, PluginHive has some great insights on how shipping costs sway buyers. This makes one thing crystal clear: getting your Shopify shipping right is non-negotiable if you want to protect your sales.
Core Shipping Approaches in Shopify
First thing's first, you need to land on a foundational strategy. Each approach fits a different type of business, and knowing the options helps you make a smarter choice right from the start.
Here’s a look at the main shipping dashboard in your Shopify admin—this is command central for your entire setup.
This is where you'll be building out your shipping profiles, defining those all-important zones, and adding the rates your customers will see when they check out.
Key Takeaway: Your shipping strategy isn't just about getting boxes out the door; it's a critical piece of your marketing. A clear and fair shipping policy builds instant trust and gives customers the confidence to click "buy."
Think of your shipping options as the final handshake in the sales process. Get it right, and the customer leaves happy and is far more likely to come back. But a confusing or pricey shipping setup can completely undo all the hard work you put into your products and marketing.
So, how do you choose the right strategy? It really comes down to your products, profit margins, and who you're selling to.
To help you get started, here's a quick rundown of your main options and where they shine.
Shopify Shipping Strategies at a Glance
This table breaks down the most common shipping rate strategies available in Shopify. Use it to figure out which approach best aligns with your business goals and product catalog.
Each of these strategies has its place, and you can even mix and match them to create a more sophisticated setup. The key is to start with the one that makes the most sense for the majority of your orders.
Alright, you've got your high-level shipping strategy sketched out. Now it's time to get into the nuts and bolts inside Shopify and actually tell the platform where you ship and what rules to apply. This all happens through two key concepts: shipping profiles and shipping zones.
Think of these as the main control panel for your entire shipping operation. They work together to make sure every single customer, no matter where they are, sees the right shipping options at the right price when they hit checkout.
A shipping profile is basically a set of rules you create for a specific group of products. Shopify gives you a "General" profile to start, which covers most of your items. But the real power comes from creating custom profiles for products that need special treatment.
For example, if you sell apparel, you wouldn't want the same shipping rule for a lightweight t-shirt and a heavy, bulky winter coat. That just doesn't make sense. The t-shirt is cheap to send, but the coat costs a small fortune. By creating a separate "Heavy Goods" profile just for the coats, you can assign them their own, more realistic shipping rates.
What Are Shipping Zones
Once you have a profile, you start building shipping zones inside of it. A shipping zone is simply a group of countries, states, or even a cluster of zip codes that all share the same shipping rates. This is where you can really get granular and protect your profit margins.
A classic real-world scenario is dealing with non-contiguous states. You could easily create one zone for the "Contiguous United States" (the lower 48) and another for "Alaska & Hawaii." This setup lets you offer a competitive flat rate to the majority of the country while charging a higher, more accurate rate for destinations that are way more expensive to ship to. If you didn't do this, you'd either lose money on every order to Alaska or overcharge your customers in New York.
The graphic below breaks down this simple, three-part process for getting your zones set up effectively.
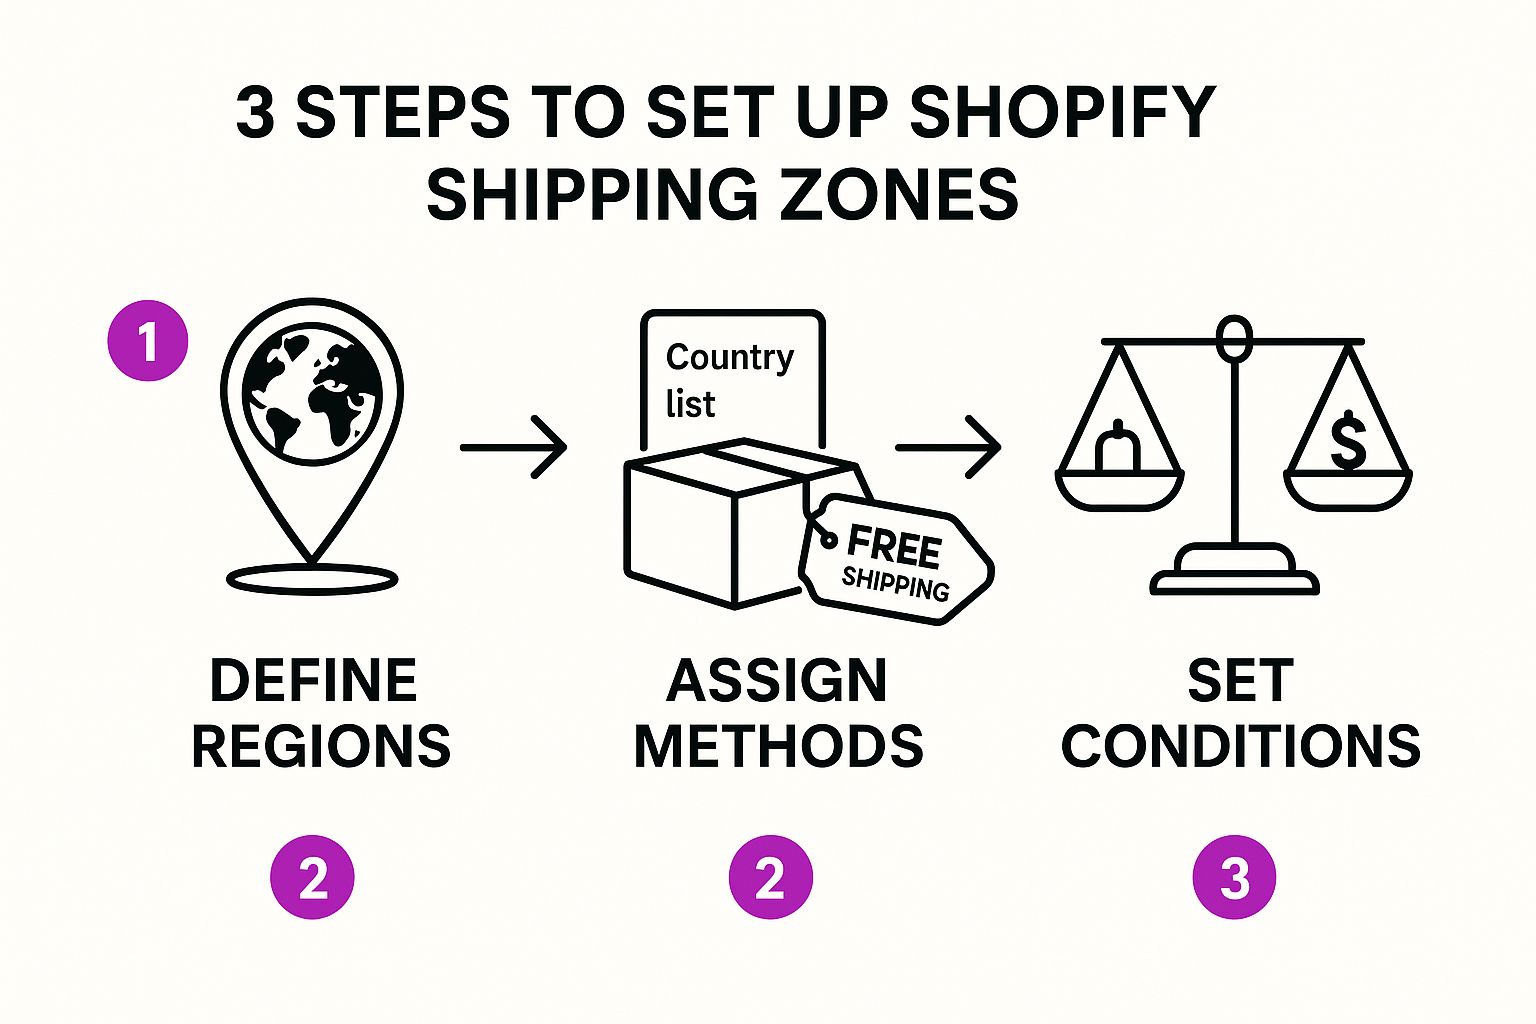
As you can see, it's a logical flow: define the regions you ship to, assign the methods you'll offer (like Standard or Express), and then set the conditions or rates for each one. This is how you build a profitable shipping structure.
Creating a Custom Shipping Profile
Let's walk through a practical example. Imagine you sell furniture. Most of your small decor items can ship via standard carriers, but your oversized armchairs have to go by freight. This is the perfect use case for a custom shipping profile.
You'd start by creating a new profile called something like "Oversized Furniture." Then, you'd add only the armchair products to it. Inside this profile, your shipping zones would look completely different from your general one. You might only offer a single, high-cost flat rate for freight, or maybe you'd even restrict shipping for these items to certain regions entirely.
Pro Tip: Don't go crazy creating dozens of profiles right out of the gate. Stick with the "General" profile for the bulk of your products. Only create new ones for the true exceptions—things that are fragile, heavy, perishable, or need any kind of special handling.
This approach keeps things clean and prevents your customers from seeing a confusing mess of options at checkout. If a customer has both a t-shirt (from the general profile) and an armchair (from the oversized profile) in their cart, Shopify is smart enough to combine the rates from both profiles and present one single, accurate shipping cost. It just works.
Configuring Realistic Shipping Rates
Alright, you’ve got your shipping zones and profiles all mapped out. Now for the fun part: deciding what to actually charge people for shipping. This is more than just a math problem to cover your costs; it's a huge piece of your conversion strategy.
Get this right, and you build trust and eliminate that last-second hesitation at checkout. Your goal is to find that perfect balance—a rate that protects your margins without scaring away a potential customer. A price that’s too high is a known cart-killer, but one that’s too low will bleed you dry over time.
Starting with Flat-Rate Shipping
For a lot of stores, especially when you're starting out, flat-rate shipping is the way to go. It's simple, predictable, and customers get it immediately. You charge one set price, no matter what’s in the cart.
Let's say you set a $7.95 flat rate for your main "Contiguous US" zone. If you sell products that are all roughly the same size and weight, like t-shirts or coffee beans, this works like a charm. It keeps the checkout experience clean and straightforward.
You can also get a bit more granular by setting up tiered flat rates. This adds a layer of accuracy without making things overly complicated for the shopper.
- By Order Price: You could offer a $10 flat rate for orders under $50, but drop it to $5 for orders over $50.
- By Order Weight: Maybe it's $8 for packages under 5 lbs and $15 for anything between 5 and 10 lbs.
Key Insight: Always give your shipping methods clear, descriptive names. Don't just call it "Flat Rate." Use something like "Standard Shipping (5-7 Business Days)" or "Economy Ground (7-10 Days)." This sets the right delivery expectations from the get-go.
The Power of Strategic Free Shipping
Never underestimate the psychological pull of "free shipping." It's one of the most effective marketing tools you have. Offering it can dramatically boost your average order value (AOV) and slash your cart abandonment rate.
The most popular and sustainable way to do this is with a minimum spend threshold.
Think about your numbers. If your current average order is around $65, setting a "Free Shipping on Orders Over $75" threshold is a brilliant move. It nudges customers to add one more small thing to their cart, boosting your AOV while making them feel like they just scored a great deal.
For a deeper dive on how to make free shipping work for you, check out our complete guide to Shopify shipping rates.
Using Carrier-Calculated Shipping for Accuracy
If your inventory is all over the place—from tiny, lightweight earrings to bulky furniture—flat rates can be a nightmare. This is where carrier-calculated shipping becomes your best friend.
This feature taps directly into carriers like USPS, UPS, or DHL to fetch real-time rates at checkout. The price is based on the customer's exact address and the specific weight and dimensions of the items in their cart.
It offers complete transparency for the customer and ensures you're not losing money or overcharging on postage. Shopify gives merchants a ton of flexibility here, allowing for flat rates, weight-based rates, price-based tiers, and real-time carrier calculations. In an era of ever-rising shipping costs, having these options is critical. You can get the full rundown on these features by exploring Shopify’s official shipping services overview.
Adding Local Delivery and Pickup Options

Not every order needs to be bubble-wrapped, slapped with a shipping label, and sent on a cross-country adventure. Some of your most valuable customers might live just a few blocks away. Tapping into that local market with delivery and pickup is a brilliant way to slash your shipping expenses, build a real community around your brand, and even go toe-to-toe with the big-box stores.
It’s an angle many store owners completely forget about. By setting these options up in your Shopify admin, you’re offering a level of speed and convenience that national carriers just can't touch. This is where your proximity becomes your superpower.
Configuring Local Delivery
Think of local delivery as your own personal courier service. Shopify lets you draw a specific geographic circle around your business where you'll personally drop off orders. You get total control over the "where" and the "how much."
You can define your delivery zone in a couple of clever ways:
- By Radius: This is the simplest method. Just set a 10-mile radius (or whatever makes sense for you) around your storefront or warehouse. It’s perfect for blanketing a city or suburban area.
- By ZIP or Postal Codes: For more surgical precision, you can hand-pick the exact postal codes you're willing to service. This is great if you want to include a few neighboring towns but skip one that's a pain to get to because of traffic or distance.
Once your zone is set, you decide on the fee. A popular strategy is offering free local delivery on orders over $50 to nudge customers toward a higher cart value. Or, you could just charge a flat $5 to cover your gas and time.
Offering In-Store Pickup
The "buy online, pick up in-store" (or BOPIS) model is a customer favorite for a reason. It's the best of both worlds—the convenience of shopping in your PJs combined with the instant gratification of getting your stuff now, without paying for shipping.
When you set this up, the name of the game is clarity. Your Shopify settings let you get super specific about how and when customers can grab their orders.
Don't leave your customers guessing. Be crystal clear with your pickup instructions. Tell them your business hours, what they need to bring (like the order confirmation email on their phone), and exactly where to go. A simple note like, "Head to the main counter and show us your email," can make the whole experience smooth and confusion-free.
Shopify even handles the notifications for you, automatically pinging customers the moment their order is bagged and ready. These local-first options aren't just about saving a few bucks on postage; they’re about forging a real connection with the people right in your own backyard.
Using Apps for Complex Shipping Scenarios
While Shopify’s built-in shipping profiles and zones are impressively powerful, some business models just have needs that go beyond the standard toolkit. You might find yourself hitting a wall when your shipping logic gets exceptionally granular or just plain weird.
This is where the Shopify App Store becomes your best friend. It’s packed with specialized tools designed to tackle the unique and complex shipping challenges that the native features can't handle alone.
When to Consider a Shipping App
So, when do you know it's time to look for an app? The signs are usually pretty clear. Maybe you sell a mix of standard products alongside items that need special handling, like refrigerated goods that can only ship to certain zip codes.
Another common trigger is the need for dimensional weight calculations. If you sell large but lightweight products—think oversized pillows or custom hats—standard weight-based rates will kill your margins. An app can calculate rates based on a package's size and volume, not just its weight, ensuring you charge customers accurately and don't lose money.
You might also find yourself needing more advanced rules, such as:
- Blocking specific products from shipping to P.O. boxes.
- Offering unique, tiered shipping rates based on the number of items in the cart.
- Creating complex, custom shipping rules for your wholesale or B2B customers.
These situations demand a level of customization that calls for a dedicated app.
Key Takeaway: If you find yourself thinking, "I just wish I could set a rule for this one specific situation," it's a huge sign that you've outgrown the native settings. A shipping app is the next logical step.
Finding the Right App for the Job
Shopify’s native shipping options are fantastic for many businesses, but for these more advanced needs, third-party apps are a must. For example, an app like Better Shipping gives you precise control over shipping rates for specific products and locations. You can build rules that adjust costs based on package weight, destination, or order value, giving you a level of personalization that can be a real competitive advantage.
Beyond just rate calculation, you can enhance your entire shipping workflow by exploring various ecommerce apps. These can help you find tools for everything from calculating duties and taxes for international orders to managing complex fulfillment logistics. For a deeper dive on how these tools fit together, check out our guide on how a Shopify shipping calculator can streamline your entire process: https://www.ecorn.agency/blog/shopify-shipping-calculator-streamline-shipping-process
Integrating the right app transforms your shipping setup from a simple cost center into a strategic asset. It lets you protect your margins, provide an accurate and fair checkout experience for your customers, and scale your business without getting bogged down by logistical headaches.
Common Shopify Shipping Questions Answered
Even with the best setup, questions always pop up. Getting your Shopify shipping configured can feel like a puzzle, and it's totally normal to wonder about specific scenarios as you get everything dialed in.
Let's walk through some of the most frequent questions we hear from merchants who are in the thick of it. Think of this as your go-to FAQ for smoothing out the common bumps in the road before you open the doors to customers.
How Do Orders With Products From Different Profiles Work?
This is a classic. What happens if a customer puts a t-shirt (from your "General" profile) and a bulky armchair (from your "Oversized Furniture" profile) into the same cart?
Thankfully, Shopify is smart about this. The system automatically looks at the shipping rules for each profile, adds the rates together, and shows a single, consolidated shipping cost at checkout.
For example, it might combine the $5.95 standard shipping for the shirt with the $99 freight charge for the chair. The customer sees one clear price: $104.95. No confusion, no weird checkout experiences. It just works.
What Is the Best Way to Offer Free Shipping?
Everyone loves free shipping. It's a powerful way to close a sale, but you have to be careful it doesn't drain your profits. The most sustainable way to do it is by tying it to a minimum order value.
Here's the trick: dive into your store’s data and find your average order value (AOV). If you see that most people spend around $65, setting a "Free Shipping on Orders Over $75" threshold is a brilliant move.
This little nudge encourages shoppers to add one more item to their cart. You boost your AOV, cover the shipping cost, and the customer feels like they’ve scored a fantastic deal. It's a win-win.
Pro Tip: A blanket "free shipping on everything" policy is rarely the most profitable approach. A smarter tactic is to offer it only on your high-margin products. You can create a specific shipping profile just for these items and make free shipping an exclusive perk for them.
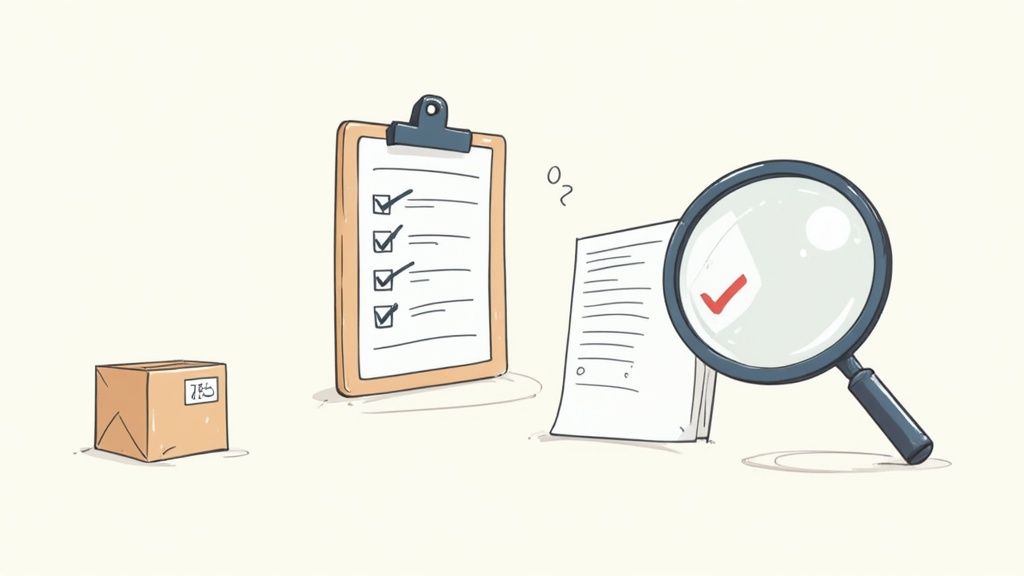
How Can I Test My Shipping Rates Before Launch?
Never, ever launch your store without testing your shipping setup first. A simple mistake here can lead to some very unhappy customers or a big financial hit for you. The absolute best way to test is to place a real order yourself.
Run through this quick checklist to be sure:
- Test different locations: Use addresses in each of your major shipping zones. Think one in California, one in New York, and maybe one in a more remote area like Alaska to see how the rates adjust.
- Check various cart combinations: Mix and match items from different shipping profiles to make sure the rates are combining correctly.
- Verify conditional rates: Add and remove items to ensure your price-based or weight-based tiers kick in exactly when they're supposed to.
Putting in this small amount of time upfront guarantees a professional, glitch-free checkout experience from day one.
At ECORN, we turn complex shipping challenges into seamless customer experiences. If you're ready to optimize your Shopify setup for growth, explore our expert services.


Omnichannel Retail Strategy: A Shopify Playbook
Product Data Enrichment: A Guide for Shopify Brands
Instagram Shopping Features a Guide for Shopify Stores

What Is Revenue Optimization: A Holistic RevOps Guide

Benefits of Conversion Rate Optimization: Boost Your
WordPress to Shopify Migration: Your 2026 Seamless Switch
Boost Sales: Ecommerce Payment Processing Guide 2026
Unified Commerce Platform: Benefits, KPIs & Shopify Guide
How to Reduce Bounce Rate eCommerce: Your 2026 Guide
Shopify API Integration: A Practical End-to-End Guide

How to Implement Data Governance: A 2026 Guide

Shopify Store Development Cost: A 2026 Breakdown
What Is Server Side Tracking: The Shopify Guide 2026
Marketing Automation Workflows: A Shopify Guide for 2026

Shopify: How to Reduce Technical Debt

Shopify UX Design Change: A Playbook for Growth
User Generated Content Strategy: Shopify Playbook

Shopify Pause and Build Plan Cost: A Complete 2026 Guide
Compare at Price on Shopify: A Complete Guide for 2026

Where Can I Sell My Prints? 10 Best Platforms for 2026
Shopify Order Management System: The Ultimate Guide 2026
What Is Marketing Attribution? an eCommerce Guide for 2026

10 Best Black Friday Sales Sheets for 2026

Discover the Top Social Media Marketing Agencies For
Consumer Confidence Definition for eCommerce in 2026
What Is Social Commerce? Your 2026 Guide to Boosting Sales

A Social Ad Campaign Playbook for eCommerce Growth
7 Best FAQ Page Examples for SaaS & eCommerce

Market Research in Fashion Industry: A Guide for Shopify

Shopify Migration Services: Expert Guide for 2026

Mastering FB Retargeting Ads for Shopify in 2026
What Is Omnichannel Ecommerce

Master Your Shopify Plus Migration: The 2026 Guide
Shopify Integration Services: A Merchant's 2026 Guide
Shopify Collection Description: A Guide to SEO & Sales

Shopify Plus Contact: Reach Sales & Support Effectively

Top Luxury Shopify Stores: Design & UX Strategies
How to Improve Customer Experience: A Shopify Roadmap

Creative Facebook Ads: 10 Examples for Shopify Brands

Remarketing with Facebook Ads: A Shopify Guide for 2026

SEO Linking Strategies for Shopify Stores
Top 7 Statistics YouTube Channels for eCommerce in 2026

Hiring Shopify Plus Designers: A Founder's Guide

Shopify Product Variation: Master Your Variants for 2026

Leverage Ai Solutions Brands: Your 2026 Shopify Growth Guide

Filters in Shopify: A Guide for Growing Brands

Shopify Plus Developer: A Guide for Growing Brands

When Does Black Friday Online Start? A 2026 Guide
Black Friday Email Marketing: Shopify & Klaviyo Guide

Polaris Design System: The Complete Shopify Guide

How to Hire a Consultant Email Marketing Expert

What Is Q4? A Shopify Merchant's Guide to Peak Season

Marketing Organization Structure for eCommerce Growth

Top Account-Based Marketing Agency Guide for 2026

7 Remarketing Ad Examples for Your 2026 Campaigns

AI Retail Solutions: Boost Your Shopify Store

Migrate to Shopify: The Definitive 2026 Guide
Shopify Authentication App: A Guide for Secure Stores

Why Strategic Marketing Is Important for Growth in 2026

How to Create a Size Chart in Shopify: 2026 Guide

Shopify Themes for Jewelry: The Definitive 2026 Guide

Minimal Shopify Templates: Faster, Higher-Converting Stores
Maximize Profit: Shopify CC Fees 2026 Guide

Best Shopify Apps for Beginners in 2026

How to Improve Online Shopping Experience in 2026

Shopify Design and Development Services: A 2026 Guide

Small Business Social Media Marketing Agency: A Hiring Guide

Bulk Edit Shopify: A Guide to Save Hours on Store Updates

2026 Trends in Food and Beverage Industry

Post Purchase Survey Guide for Shopify Stores

How to Build an Ecommerce Brand in 2026
Conversion Rate Optimization for Ecommerce: Maximize Profit
How to Use Customer Data to Increase Sales: A Guide

Shopify for Enterprise: The 2026 Deep Dive Guide

Email Marketing Agencies: The Guide for Shopify Brands
Boost Sales With The Right Shipping Shopify App

Your Guide to the Shopify Site Map

7 Headless Commerce Examples for 2026

Mastering Trends in Cosmetic Industry for 2026
Transfer Shopify to BigCommerce The Complete 2026 Playbook

What Is Shopify Collective? Your 2026 Guide to Success

Unlock Shopify Growth with Site Link SEO

Integrating Shopify and WordPress A Complete Guide for 2026

Naming a Clothing Store: A Shopify Founder's Playbook

Guide to buying shopify store in 2026

Buying shopify store: Buying a Shopify Store: Invest Wisely

Food & Beverage Marketing: A Complete Guide for 2026

Facebook Ads Agency: A Shopify Brand's Hiring Guide

Shopify Apparel Stores: A 2026 Launch & Scale Guide

How to Deactivate Shopify Store: The 2026 Guide

Shopify and Square: The 2026 Ultimate Comparison

Your Guide to Beauty Products Ecommerce

A Guide to Marketing for Beauty Brands in 2026

Your Guide to Facebook Black Friday Ads
Facebook Ad Ecommerce for Shopify Growth

Iconography Web Design The Definitive Guide for Shopify Stores

A Modern Backlinks SEO Strategy for Shopify Stores

How to Launch an Online Store: A Step-by-Step Success Guide

Optimize Shopify Store: Master Performance in 2026

Successful Migration for Shopify: Protect SEO & Grow


newsletter in your inbox