
Ever felt boxed in by Shopify's standard fields? If you've ever thought, "I just wish I had a spot to put this one specific piece of information," then you've already discovered the need for metafields.
In a nutshell, metafields are custom data fields you can attach to almost anything in Shopify—products, collections, customers, you name it. They’re like extra information slots that let you go way beyond the basics of title, price, and SKU. This is how you store and show unique details like care instructions, material composition, or warranty periods right on your storefront.
What Are Shopify Metafields and Why Do They Matter?
Let's say you sell high-end furniture. A customer is looking at a beautiful sofa and wants to know the exact materials, the type of wood used for the legs, and how long it might take to assemble. Shopify’s standard setup doesn’t have a built-in field for "Leg Material" or "Assembly Time." This is precisely where metafields save the day.

Metafields are essentially empty containers you define and then fill with whatever information your customers need. They turn generic product pages into rich, detailed resources that answer questions before they're even asked, building trust and pushing conversions.
Moving Beyond Standard Data Fields
For a long time, using metafields meant diving into code or relying on paid apps, which put them out of reach for many merchants. Thankfully, those days are over. Shopify has now integrated metafield management right into the admin dashboard, turning a once-niche developer tool into a must-have for any serious store owner.
By using metafields, you aren't just adding data; you're building a smarter, more helpful store. The payoff is huge:
- Boost Customer Confidence: Showing detailed specs like dimensions, materials, or country of origin helps buyers make informed decisions, reducing hesitation and returns.
- Sharpen Your SEO: More unique, relevant content on your product pages can help you rank for very specific, long-tail keywords that high-intent buyers use.
- Power-Up Storefront Filtering: When you use metafields to add custom data, you can then use that data to create incredibly detailed collection filters, letting customers find exactly what they want.
Thinking about metafields as part of your broader e-commerce solutions is key. They optimize your product information for both human shoppers and search engine crawlers.
A Powerful Tool for Customization
To give you a better idea of how this works in practice, let's compare what you get out-of-the-box with what you can achieve with metafields.
Standard Fields vs Metafields At a Glance
This table just scratches the surface. The flexibility is the real game-changer here, letting you adapt your product data to your specific niche.
Shopify allows up to 200 metafield definitions for each part of your store (like products or collections), which is an incredible amount of room for customization. You can add those highly specific data points that address the exact questions your customers have—the ones that, if left unanswered, could cost you a sale.
At the end of the day, if you find yourself wishing Shopify had a field for that, the answer is almost always metafields. They are the key to unlocking a truly custom and data-rich storefront.
Creating and Managing Metafields in Your Admin
Long gone are the days of needing a developer on standby just to add a simple piece of custom data. The power to create and manage Shopify metafields is now baked right into your admin dashboard, putting you in the driver's seat. What was once a highly technical task is now a straightforward process that lets you shape your store’s data exactly how you need it.
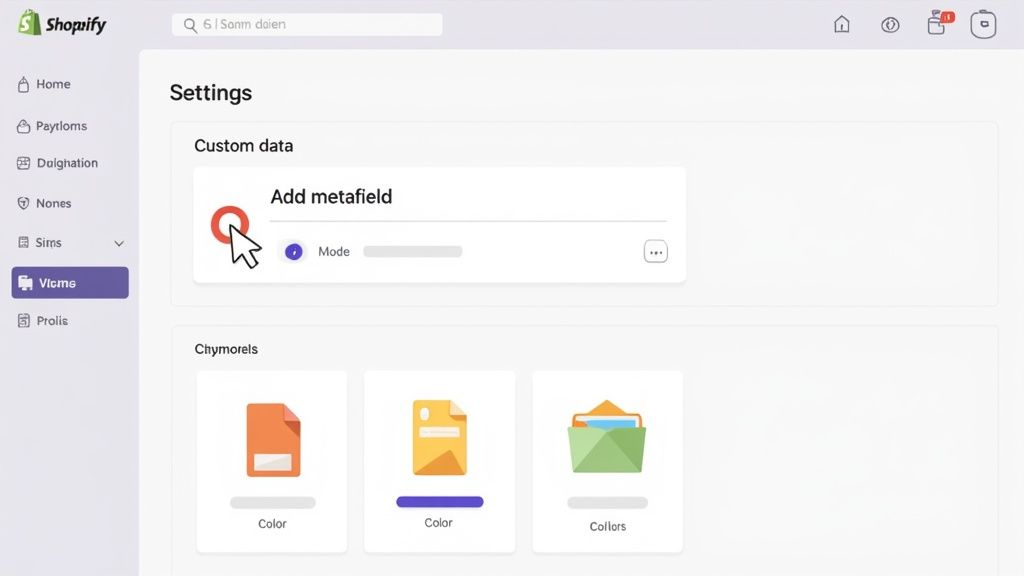
It all starts in your Shopify Admin. Head over to Settings in the bottom-left corner of your dashboard, and from there, click on Custom data. Think of this as your central hub for all things metafields. From here, you can add and manage custom fields for every corner of your store—products, variants, collections, customers, you name it.
Defining Your First Metafield
Once you’re in the Custom data section, you’ll pick which part of your store needs the new field. Let's say we're adding one to Products. When you click "Add definition," a form pops up asking for a few key details that will determine how this new data field works.
Here's the info you'll need to fill in:
- Name: This is the label everyone sees. Keep it clear and descriptive, like "Care Instructions" or "Assembly Time."
- Namespace and key: Shopify handles this for you, automatically creating a unique ID based on the name (e.g.,
custom.care_instructions). This is what your theme and apps will use to find the data. - Description: This field is optional, but I highly recommend using it. It's an internal note for you and your team explaining the metafield's purpose. Trust me, it helps keep things organized down the line.
Now for the most important decision: the content type. This single choice dictates what kind of information the field can store and how it will behave.
Choosing the Right Content Type
Shopify gives you a whole menu of content types, each built for a specific job. Nailing this choice from the get-go is crucial for data integrity and a smooth workflow. It helps prevent frustrating data entry mistakes and makes sure everything displays correctly on the storefront.
Here’s a quick rundown of common types and where they shine:
- Single-line text: Perfect for short, snappy info like a "Material" or "Country of Origin."
- Multi-line text: The go-to for longer content. Think detailed product descriptions, artist bios, or those "Care Instructions."
- File: Lets you upload a file directly. This is ideal for attaching a downloadable PDF warranty, a size guide, or a high-res spec sheet.
- URL: For any kind of external link, like one pointing to a product review or the manufacturer's website.
- Date and time: Essential for time-sensitive data, such as an "Event Date" or "Product Release Date."
- Color: This gives you a color picker, ensuring consistent color data for things like swatches or product filters.
- Product reference: A fantastic way to link to another product in your store. Use it to build "Complete the Look" sections or suggest accessories.
Just thinking through how you plan to use the data will point you to the right type. For example, a warranty document works best as a "File" type, not a "URL," so the customer can download it right from the page.
Pro Tip: Always choose the most specific content type you can. If you need to store a number, use the "Number" type, not "Single-line text." This unlocks powerful validation rules and lets you use the data for numerical sorting or filtering later on.
Setting Up Validation Rules
After picking a content type, you can add validation rules. This is a simple but incredibly useful feature that acts as a quality control checkpoint for your data. You can set character limits on text, or define a minimum and maximum value for a number.
For instance, you could set a rule that an "Assembly Time" metafield must be a number between 5 and 120 minutes. This simple guardrail prevents someone from accidentally typing "one hour" or "-10." These little rules ensure your data stays clean, consistent, and reliable across your entire catalog, saving you from massive cleanup headaches.
Once you hit save, your new metafield is live! It will now appear on the corresponding product, collection, or customer page, ready for you to start adding your custom data.
Making Metafields Visible on Your Storefront
Alright, so you’ve created your custom data using Shopify metafields. That’s a great start, but right now, that data is just sitting in your admin. It's useless until your customers can actually see it on your storefront.
This is where you bridge the gap between your backend setup and the live customer experience. It can feel a bit technical, but Shopify gives you a couple of solid ways to handle it, whether you prefer clicking around in the theme editor or getting your hands dirty with a little bit of code.
We'll look at the two main paths for getting this done. First, we’ll use dynamic sources inside the Shopify theme editor—a powerful, no-code solution. Then, we'll dive into simple Liquid snippets for those who want more precise control within the theme files.
Using Dynamic Sources in the Theme Editor
For most store owners, the theme editor is the quickest and simplest way to get metafields showing up. Modern Shopify themes are built to use "dynamic sources," which is just a fancy way of saying you can link a section or block directly to a metafield without writing a single line of code.
Let’s say you created a "Care Instructions" metafield for your clothing products. Here’s how you’d get it to show up on the product page:
- First, head to your theme editor by going to Online Store > Themes > Customize.
- Navigate to a product page and add a new block, maybe something like a "Text" block or a "Collapsible row."
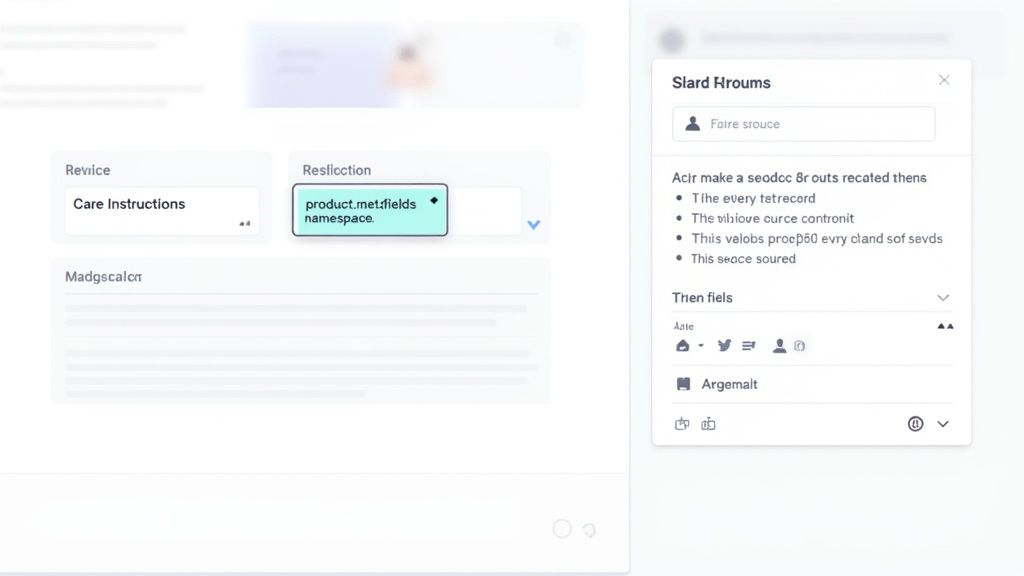
- Instead of typing in static text, look for the small "connect dynamic source" icon. It looks like a stack of three little discs. Click it.
- A list will pop up. Just select your "Care Instructions" metafield from that list.
And that’s it. Seriously. The theme will now automatically pull the specific care instructions for whatever product a customer is viewing and pop it right into that block. This method is incredibly handy for adding unique details like product specifications, artist bios on collection pages, or material breakdowns.
This no-code approach is perfect for quick additions and lets you enrich your pages without having to call a developer. It's the best place to start if you're new to metafields.
Adding Metafields with Liquid Code
Sometimes you need more granular control over placement, or you might be working with a theme that doesn't let you connect a dynamic source in the exact spot you want. For those situations, you'll need to use Liquid, Shopify’s own templating language. It might sound intimidating, but the basics are pretty straightforward.
All metafields are accessed through a simple object pattern: resource.metafields.namespace.key. Let's quickly break that down:
resource: This is just the type of page you're on, likeproduct,collection, orarticle.metafields: This part is always the same. It tells Liquid you're looking for metafields.namespace: The group you put your metafield into (often justcustomby default).key: The unique name you gave your metafield (e.g.,care_instructions).
A Practical Product Page Example
Let's stick with our "Care Instructions" (custom.care_instructions) example. Imagine you want to display it right under the product title in your main-product.liquid theme file. You'd find the right spot in the code and pop in a small snippet.
A good best practice is to always wrap your Liquid code in a conditional check. This makes sure that nothing shows up if a particular product doesn't have that metafield filled out, preventing weird blank spaces on your page.
Here’s a simple snippet you can copy and paste:
{% if product.metafields.custom.care_instructions != blank %}
Care Instructions
{{ product.metafields.custom.care_instructions }}
{% endif %}
This code first checks if the care_instructions metafield actually has any content (!= blank). If it does, it prints a heading and then the value of the metafield inside a paragraph. If the metafield is empty for that product, the entire block of code is simply ignored. This little piece of logic is key to building clean, professional-looking product pages.
Getting comfortable with this basic syntax opens up a ton of possibilities. If you're looking to go deeper, understanding how your theme files are structured is the next step. For a great overview, check out our guide on Shopify custom theme development, which walks you through how all the pieces fit together.
How Metafields Can Improve Your SEO
Let's clear up a common myth right away. Shopify metafields aren't the same as the meta tags that directly shape your search snippets, like a meta title or description. But—and this is a big but—when used strategically, they become one of the most powerful tools in your SEO arsenal.
The magic happens when you use metafields to add unique, valuable content directly onto your storefront pages. This transforms a simple data field into rich, indexable text that search engines crawl and understand. This extra detail helps Google grasp what your product is really about with far greater accuracy.
The SEO impact of metafields hinges entirely on how you use them. When you surface custom data like product materials, country of origin, or detailed specifications on the page, it becomes part of the HTML that search engines read. This richer content can lead to better indexing and, ultimately, higher rankings.
Targeting Long-Tail Keywords
Think about how your most serious buyers actually search. They rarely just type "red shirt." They're looking for something specific, like "men's merino wool moisture-wicking red t-shirt." These highly specific, long-tail keywords signal strong purchase intent, and metafields are your secret weapon for capturing this traffic.
By creating metafields for attributes like "Material," "Fabric Technology," or "Fit," you can inject this exact language onto your product pages. Suddenly, you have keyword-rich content that perfectly aligns with what your ideal customers are searching for, dramatically boosting your odds of ranking for those valuable terms.
Imagine a furniture store adding metafields for:
- Wood Type: Solid oak, acacia, mango wood
- Finish: Hand-distressed, matte lacquer, oil-rubbed
- Origin: Made in Italy, handcrafted in Vietnam
This kind of granular detail turns a generic product page into a hyper-specific landing page that perfectly answers a precise search query.
Building Topical Authority with FAQs
One of the smartest SEO plays is demonstrating expertise and building topical authority. A fantastic way to do this is by using metafields to create a unique FAQ section for each individual product, which is miles better than a generic, site-wide FAQ page.
Just create a multi-line text metafield—let's call it "Product FAQs"—and fill it with questions and answers specific to that item.
For a leather jacket, your FAQ metafield might answer: "How do I care for the leather?" or "Is this jacket suitable for winter?" For a tech gadget, it might answer: "What is the battery life?" or "Is it compatible with my device?"
This approach nails two crucial things for your SEO. First, it adds a ton of relevant, keyword-rich content directly to the product page. Second, it helps you capture those "question-based" search queries that are becoming more and more common. You're positioning your page as the definitive resource, building trust with both customers and search engines. Making metafields part of your product and collection page strategy is a core part of modern ecommerce SEO best practices.
Beyond Products: Improving Technical SEO
While most of the focus lands on products, metafields can also help with some of the more technical SEO tasks across your site. For example, in the rare case you’re dealing with potential duplicate content issues, you could create a URL-type metafield to manually set a canonical URL for a specific page, blog post, or collection.
This gives you pinpoint control over how search engines index your site, ensuring all your link equity gets pointed to the right page. This level of control is essential for maintaining a healthy, well-optimized store. Of course, if you're serious about climbing the search rankings, this is just one piece of a much bigger puzzle. Diving into a complete guide to SEO for Shopify stores will help you build out the rest of your strategy.
Advanced Metafield Workflows for Power Users
When your store really starts to take off, managing Shopify metafields one by one in the admin just doesn't cut it anymore. It's fine for a handful of products, but not for merchants with huge catalogs, developers juggling multiple environments, or anyone trying to sync with a PIM or ERP. This is where you graduate from the UI and start managing your data programmatically.
Automating how you create, update, and sync metafields saves an incredible amount of time and cuts down on the human errors that inevitably creep in. It's about building scalable, repeatable workflows that treat your custom data like a core part of your business—not just some add-on.
Managing Metafields at Scale with APIs
Shopify gives us two powerful APIs for working with store data, and that includes metafields: the good old REST Admin API and the newer GraphQL Admin API. Both will get the job done, but they're built for different kinds of tasks and have unique strengths, especially when you're working at scale.
The REST API is often the simpler choice for quick, single-resource jobs. Need to write a script to update one specific metafield on a single product? REST is straightforward and easy to wrap your head around. The trouble starts with bulk operations. It can get really chatty, forcing you to make separate API calls for every little thing, which is a fast track to hitting your API rate limits.
This is exactly where the GraphQL API comes in and saves the day. It lets you ask for only the data you need and even perform multiple updates or creations in a single shot. Imagine you need to update the "Material Composition" and "Country of Origin" metafields for 50 products. With GraphQL, you can bundle that into one efficient request. Doing the same thing with REST would mean 100 separate API calls.
For any task that involves bulk metafield operations—like a big data migration or a script to update thousands of products—GraphQL is hands down the better tool. Its efficiency means fewer API calls, which keeps you well under your rate limits and makes your scripts run much, much faster.
Shopify API Comparison for Metafield Management
To put it plainly, choosing the right API for the job is crucial. Here’s a quick breakdown of how the REST and GraphQL APIs stack up when you're dealing with metafields.
As you can see, for any serious, large-scale work, GraphQL's precision and efficiency make it the clear winner.
Automating with the Shopify CLI
For developers and agencies building themes, the Shopify CLI is an absolute game-changer. It bridges the gap between your local machine and your Shopify store, letting you pull down and push up theme files and settings. And critically, this includes your metafield definitions.
This workflow is a lifesaver for keeping things consistent across different environments, like your local dev store, a staging site for client review, and the live production store.
Instead of manually clicking through the admin to recreate dozens of metafield definitions on each store, you can just do this:
- Pull Definitions: Run a single CLI command to download all the metafield definitions from a source store. It neatly saves them as JSON files in your project.
- Version Control: Commit those JSON files to your Git repository. Just like that, your metafield structure is version-controlled right alongside your theme code.
- Push Definitions: When it's time to deploy to a new environment, another command pushes all those definitions to the target store in seconds.
Following this process ensures every store has the exact same custom data structure. This is vital for squashing bugs and making sure your theme's dynamic sources work everywhere without a hitch. It turns a tedious, error-prone manual chore into a reliable, automated step in your deployment pipeline—a must for any serious Shopify dev team.
Common Questions About Shopify Metafields
Once you start using Shopify metafields, you'll inevitably run into a few questions. It’s a powerful feature, so a little confusion is natural. This section is here to clear up the most common sticking points and give you the direct answers you need to keep your project moving.
A typical development flow often looks something like this: edit your metafields locally, sync them with your development store, and then deploy the changes to your live theme.
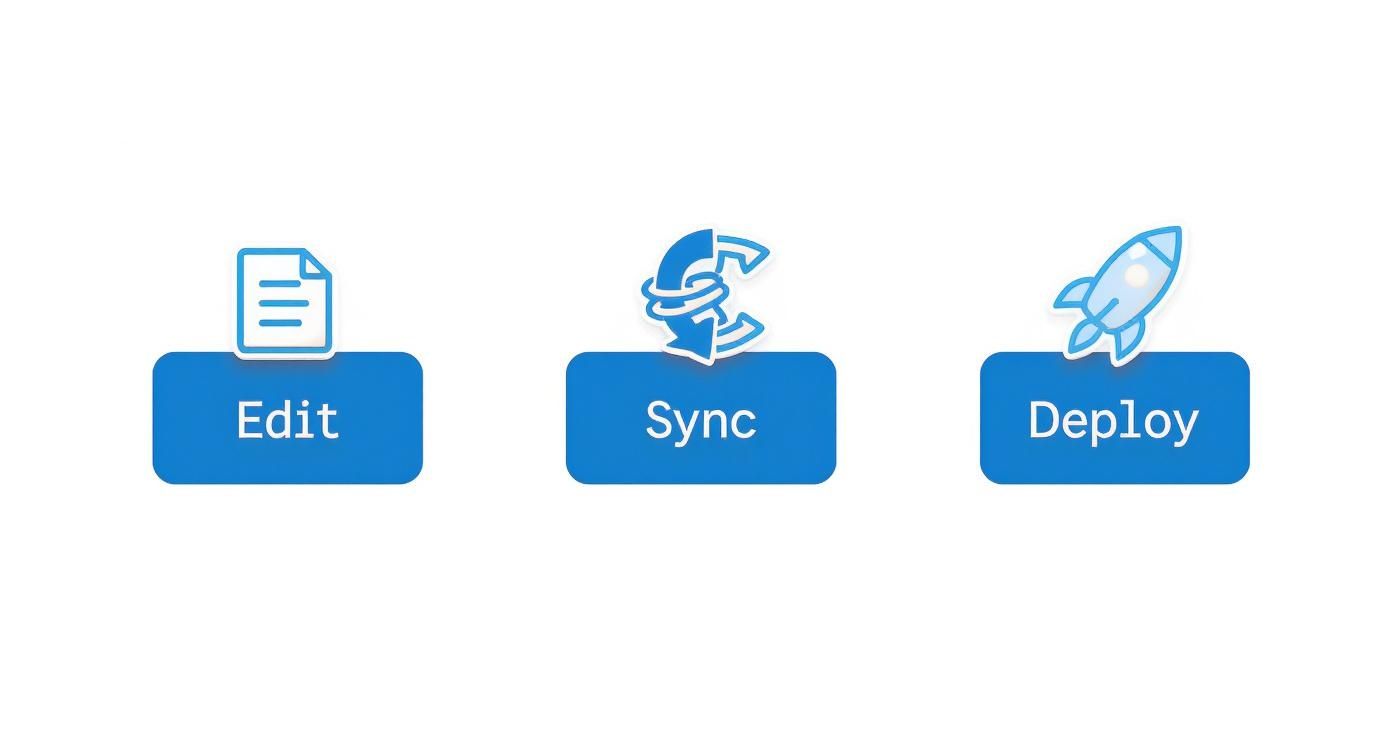
Treating metafield management this way turns it into a structured, repeatable part of your development cycle, not just a one-off task.
Metafields Versus Product Tags
One of the first hurdles for many is understanding the difference between a metafield and a simple product tag. They look similar at a glance, but they're built for entirely different jobs.
Think of tags as simple, unstructured labels. They’re perfect for broad filtering and customer-facing navigation—things like sale, new-arrival, or organic-cotton.
Metafields, on the other hand, are for structured, specific pieces of data. They have defined types (like text, number, or file) and are used to store consistent information that a tag just can't handle.
A good rule of thumb: If you need a label to help customers filter a collection, use a tag. If you need to display a specific piece of data on a product page, like "Warranty Period: 2 Years," you absolutely need a metafield.
Bulk Editing Metafields Natively
The thought of editing hundreds of products one by one is enough to give anyone a headache. So, can you bulk edit metafields without an app or custom code? Yes, you absolutely can.
Shopify has a powerful bulk editor built right into the admin. From your Products page, you can open an interface that works a lot like a spreadsheet. Just add columns for the metafields you want to change, and you can tab through and update values across dozens of products at once.
While dedicated apps and API scripts offer more horsepower for massive migrations, the native editor is surprisingly capable for most day-to-day updates.
Understanding Metafield Limits
It's smart to ask about limits, but don't worry—Shopify's are incredibly generous. You can create up to 200 metafield definitions for each type of resource.
That means you can have 200 product metafields, another 200 for collections, 200 more for customers, and so on. It’s not a store-wide total. For the vast majority of merchants, even those with highly complex product catalogs, this is more than enough room to build out any custom data you need.
How Quickly Do Changes Appear
Here's a practical one: if I update a metafield, how long until it shows up on my store? The answer is, almost instantly.
When you change a metafield value in the Shopify admin and hit save, that data is updated in real-time. The new information will be there on the very next page load. While aggressive caching could theoretically cause a small delay, the platform is built for immediacy. You can make updates with confidence, knowing they'll go live without a long wait.


Master How to Improve Email Deliverability in 2026

Top 7 eCommerce Partners NYC for Shopify Brands in 2026

Machine Learning for Ecommerce: Boost Your Shopify Store

Beauty Market Research: Your 2026 Growth Guide

Shopify International Expansion: A 2026 Roadmap
What Does CRO Stand for in Business: Understanding CRO

Shopify Visual Merchandising: A Playbook for Higher Sales

Shopify Landing Page Design: Master Conversion in 2026

10 Best AI SEO Optimization Tools for Shopify in 2026

Agentic AI for Ecommerce: Boost Your Sales in 2026
Mastering Email Marketing Data for eCommerce Growth

Conversion Rate Optimisation Australia: Boost Your Sales
Conversion Rate Optimization AI: Your Shopify Store Guide

10 Product Bundling Strategies for Shopify in 2026
How to Increase Customer Lifetime Value: A Shopify Playbook
AI Customer Service Automation: Shopify Guide 2026
Clean Website Design: A Shopify Conversion Playbook

Omnichannel Retail Strategy: A Shopify Playbook
Product Data Enrichment: A Guide for Shopify Brands
Instagram Shopping Features a Guide for Shopify Stores

What Is Revenue Optimization: A Holistic RevOps Guide

Benefits of Conversion Rate Optimization: Boost Your
WordPress to Shopify Migration: Your 2026 Seamless Switch
Boost Sales: Ecommerce Payment Processing Guide 2026

Unified Commerce Platform: Benefits, KPIs & Shopify Guide

How to Reduce Bounce Rate eCommerce: Your 2026 Guide
Shopify API Integration: A Practical End-to-End Guide

How to Implement Data Governance: A 2026 Guide

Shopify Store Development Cost: A 2026 Breakdown
What Is Server Side Tracking: The Shopify Guide 2026
Marketing Automation Workflows: A Shopify Guide for 2026

Shopify: How to Reduce Technical Debt

Shopify UX Design Change: A Playbook for Growth

User Generated Content Strategy: Shopify Playbook

Shopify Pause and Build Plan Cost: A Complete 2026 Guide
Compare at Price on Shopify: A Complete Guide for 2026
Where Can I Sell My Prints? 10 Best Platforms for 2026
Shopify Order Management System: The Ultimate Guide 2026
What Is Marketing Attribution? an eCommerce Guide for 2026
10 Best Black Friday Sales Sheets for 2026

Discover the Top Social Media Marketing Agencies For

Consumer Confidence Definition for eCommerce in 2026

What Is Social Commerce? Your 2026 Guide to Boosting Sales

A Social Ad Campaign Playbook for eCommerce Growth

7 Best FAQ Page Examples for SaaS & eCommerce

Market Research in Fashion Industry: A Guide for Shopify

Shopify Migration Services: Expert Guide for 2026

Mastering FB Retargeting Ads for Shopify in 2026
What Is Omnichannel Ecommerce

Master Your Shopify Plus Migration: The 2026 Guide
Shopify Integration Services: A Merchant's 2026 Guide
Shopify Collection Description: A Guide to SEO & Sales

Shopify Plus Contact: Reach Sales & Support Effectively

Top Luxury Shopify Stores: Design & UX Strategies

How to Improve Customer Experience: A Shopify Roadmap

Creative Facebook Ads: 10 Examples for Shopify Brands

Remarketing with Facebook Ads: A Shopify Guide for 2026

SEO Linking Strategies for Shopify Stores

Top 7 Statistics YouTube Channels for eCommerce in 2026

Hiring Shopify Plus Designers: A Founder's Guide

Shopify Product Variation: Master Your Variants for 2026

Leverage Ai Solutions Brands: Your 2026 Shopify Growth Guide

Filters in Shopify: A Guide for Growing Brands

Shopify Plus Developer: A Guide for Growing Brands

When Does Black Friday Online Start? A 2026 Guide
Black Friday Email Marketing: Shopify & Klaviyo Guide

Polaris Design System: The Complete Shopify Guide

How to Hire a Consultant Email Marketing Expert

What Is Q4? A Shopify Merchant's Guide to Peak Season

Marketing Organization Structure for eCommerce Growth

Top Account-Based Marketing Agency Guide for 2026

7 Remarketing Ad Examples for Your 2026 Campaigns

AI Retail Solutions: Boost Your Shopify Store

Migrate to Shopify: The Definitive 2026 Guide
Shopify Authentication App: A Guide for Secure Stores

Why Strategic Marketing Is Important for Growth in 2026

How to Create a Size Chart in Shopify: 2026 Guide

Shopify Themes for Jewelry: The Definitive 2026 Guide

Minimal Shopify Templates: Faster, Higher-Converting Stores
Maximize Profit: Shopify CC Fees 2026 Guide

Best Shopify Apps for Beginners in 2026

How to Improve Online Shopping Experience in 2026

Shopify Design and Development Services: A 2026 Guide

Small Business Social Media Marketing Agency: A Hiring Guide

Bulk Edit Shopify: A Guide to Save Hours on Store Updates

2026 Trends in Food and Beverage Industry

Post Purchase Survey Guide for Shopify Stores

How to Build an Ecommerce Brand in 2026
Conversion Rate Optimization for Ecommerce: Maximize Profit
How to Use Customer Data to Increase Sales: A Guide

Shopify for Enterprise: The 2026 Deep Dive Guide

Email Marketing Agencies: The Guide for Shopify Brands
Boost Sales With The Right Shipping Shopify App

Your Guide to the Shopify Site Map

7 Headless Commerce Examples for 2026

Mastering Trends in Cosmetic Industry for 2026

Transfer Shopify to BigCommerce The Complete 2026 Playbook

What Is Shopify Collective? Your 2026 Guide to Success

Unlock Shopify Growth with Site Link SEO

Integrating Shopify and WordPress A Complete Guide for 2026


newsletter in your inbox