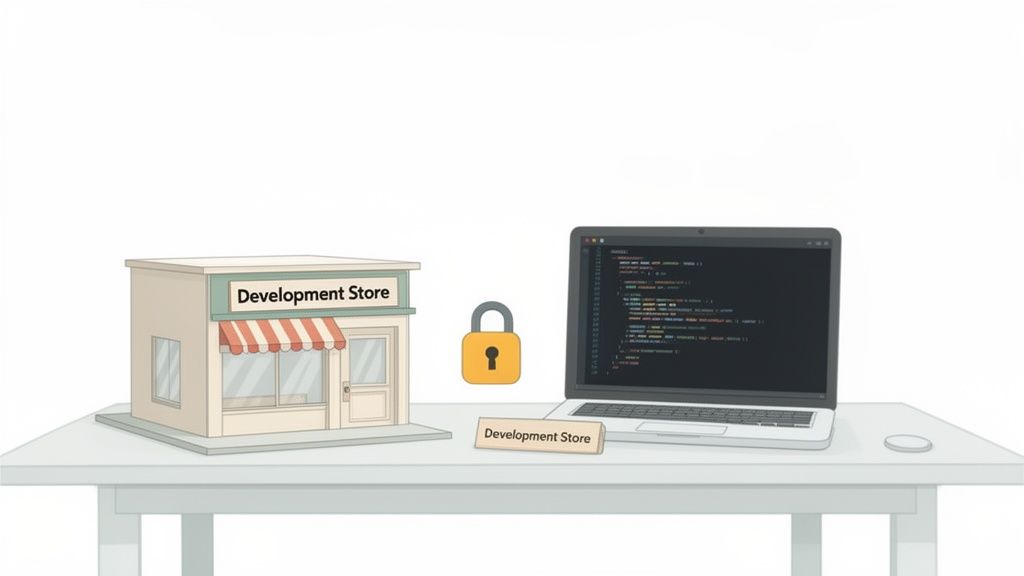
Think of a Shopify development store as your private eCommerce workshop. It’s a completely free, risk-free sandbox where you can build a brand-new store from scratch, test a major redesign, or play around with new apps—all without your live customers ever seeing a thing.
Essentially, it's a free, permanent, and unlimited trial version of Shopify, built specifically for developers, agencies, and merchants who need a safe place to create and tinker.
The Role of a Development Store
A Shopify development store is a fully-functional but non-public version of a Shopify store, and you can only create one through a Shopify Partner account. It isn't just a temporary free trial; it's a permanent, feature-rich environment designed from the ground up for creation and testing.
Imagine it as the "test kitchen" for an online business. Before a chef rolls out a new dish on the main menu, they first perfect the recipe in a separate kitchen. Mistakes are made, ingredients are swapped, and techniques are refined—all without a single paying customer being affected.
That's exactly what a development store lets you do. It’s a controlled environment where you can build and polish every last detail of an online store in total isolation. This is absolutely crucial for preventing costly errors, downtime, or a clunky customer experience on your live site. It’s the professional standard for building and managing a modern eCommerce presence.
Who Needs a Development Store?
This tool isn't just for one type of person. Its flexibility makes it an indispensable part of the workflow for a few key players in the Shopify ecosystem:
- Agencies and Freelancers: This is their bread and butter. They use dev stores to build client sites from the ground up in a secure, collaborative space before the official handover.
- Established Merchants: Smart business owners use them as a "staging environment." It's the perfect place to test out theme updates, new app integrations, or sweeping design changes without disrupting a single sale.
- App Developers: They rely on these stores to build, test, and debug their applications, making sure everything works perfectly before listing on the Shopify App Store.
A common mistake is confusing a development store with a standard free trial. A free trial is for merchants to quickly explore the platform for a few days before committing. A development store is a professional tool for building, with no time limit.
This distinction is a big deal. A development store gives you the freedom to work on a project for weeks or even months without the pressure of an expiring trial. It’s the foundational tool for any serious Shopify project, ensuring that what eventually goes live is polished, tested, and ready for customers.
Development Store vs Live Store At a Glance
To make the distinction crystal clear, here’s a quick breakdown of how a development store stacks up against a standard, live Shopify store that customers can shop from.
As you can see, they serve very different—but equally important—roles. The development store is the behind-the-scenes workshop, while the live store is the polished, customer-facing storefront.
How Different Teams Use Development Stores
A Shopify development store isn't a one-size-fits-all tool. Think of it more like a versatile workshop that adapts to whoever is using it. A master woodworker might use it to build a custom piece of furniture, while a mechanic uses it to rebuild an engine. The space is the same, but the projects—and the goals—are entirely different.
It's the same in the Shopify world. Various teams rely on development stores for distinct, critical parts of their work. For a creative agency, it’s the blueprint room. For a merchant, it’s the flight simulator. And for an app developer, it’s the science lab.
Agencies Building for Clients
For any web design and development agency worth its salt, the Shopify development store is the command center for every client project. This is where a new eCommerce vision is brought to life, brick by digital brick. It's a private, collaborative space where agencies can build, design, and configure a client's store from the ground up without the pressure of it being live to the public.
This workflow is essential for a few key reasons:
- Secure Collaboration: Agencies can give clients a sneak peek into the dev store to review progress, provide feedback, and request changes in a live but totally controlled setting.
- Risk-Free Iteration: Designers and developers get to play. They can experiment with different layouts, color palettes, and custom features without the heart-stopping fear of breaking a live website.
- Flawless Handover: Once the project is built, tested, and gets the final thumbs-up, the entire store is seamlessly transferred to the client. They just pick a paid plan, and they’re ready to launch a perfectly polished site.
Merchants Testing on a Staging Ground
For established merchants already running a successful Shopify store, a development store is a vital staging environment. Making significant changes directly on a live site that's actively making money is just asking for trouble. A single bug or a clunky design change could mean lost sales and a hit to your brand's reputation.
Instead, smart merchants clone their live store into a development environment to safely test out changes. This is their sandbox for:
- Overhauling a Theme: Testing and perfecting a complete redesign for a new season or a major rebrand.
- Integrating New Apps: Making sure that cool new app plays nicely with their existing setup before unleashing it on the live store.
- Running A/B Tests: Experimenting with new product page layouts or checkout flows to see what actually converts better, all without confusing real customers.
This process ensures that by the time a change goes live, it's been thoroughly vetted and is guaranteed to work flawlessly. No surprises, no disruptions.
Using a development store as a staging environment is the difference between rehearsing a play dozens of times and performing it live on opening night without ever having read the script. One leads to a standing ovation; the other, to chaos.
App Developers Creating New Tools
For the developers building the next great Shopify app, the development store is their laboratory. It's a clean, isolated sandbox where they can build, test, and debug their creations. Without this tool, getting an app market-ready would be a nightmare.
This environment allows them to simulate real-world store conditions and see how their app behaves under different scenarios. They can interact with Shopify's APIs, test how data is handled, and polish the user interface. This rigorous testing ensures that when an app finally lands on the Shopify App Store, it’s stable, secure, and ready to help merchants grow. If you're looking for help with your own project, check out our guide on how to find the right Shopify developer for your project in our detailed guide.
Creating Your First Development Store Step by Step
Ready to roll up your sleeves and start building? Getting your first Shopify development store off the ground is surprisingly simple. The only thing you need before you start is a free Shopify Partner account—think of it as your all-access pass to Shopify's entire suite of tools for agencies and developers. Signing up costs nothing and immediately drops you into your Partner Dashboard.
Once you're in the dashboard, you’re ready to go. This is your command center for managing every client project, app build, and, of course, all your development stores.
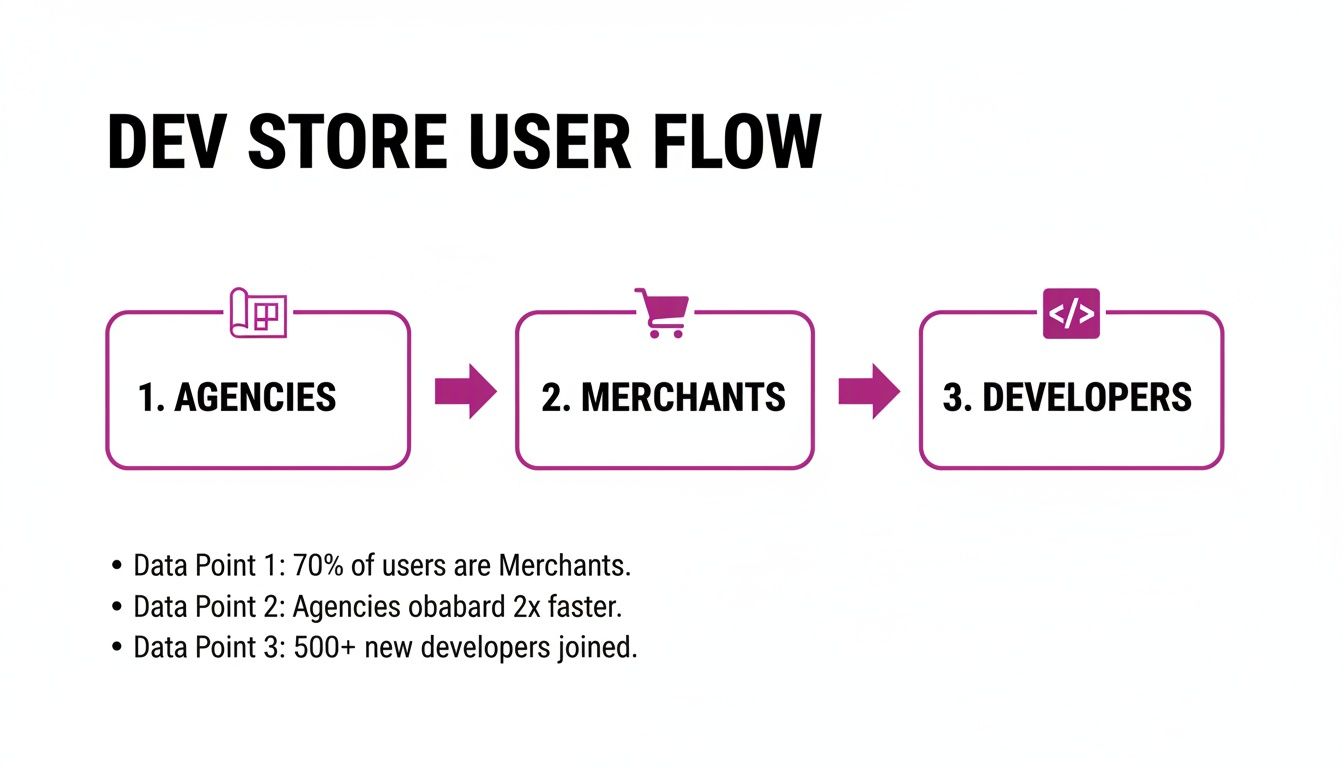
The user flow above gives you a bird's-eye view of how different pros—agencies, merchants, and developers—all tap into dev stores for their unique workflows. It’s a versatile tool, and this process shows just how central it is to the ecosystem.
The Initial Setup Process
Let's walk through the clicks to get your store created. Shopify designed this to be quick, so you can spend less time on setup and more time on the fun part.
- Navigate to Development Stores: From your main Shopify Partner Dashboard, find and click on the "Stores" link in the menu on the left.
- Add a New Store: Look for the "Add store" button, usually in the top right corner of the page. Clicking this kicks off the creation wizard.
- Choose Your Store Type: This is a key step. Shopify will ask what you're building. Make sure you select "Create a development store." You'll then get a choice between building for a client or creating a store to test an app or theme. While this choice helps Shopify tweak the experience, both paths lead to the same powerful development environment.
- Enter Store Details: Give your new store a name. This will automatically generate a default
.myshopify.comURL for you, which you can edit if your preferred name is still available. - Select a Build: You’ll have the option to start with the latest developer preview to get a sneak peek at upcoming features, or you can stick with the current stable build. For any client work, the stable build is always the recommended choice.
Pro Tip: Never start from a completely blank slate. To build a realistic testing environment that actually feels like a live business, use Shopify's import tools to populate the store with real product data (via a CSV export) from an existing site. This lets you test theme tweaks and app features with actual product photos, variants, and descriptions—not just dummy content.
The first time you do this, it might feel like a lot, but remember there are tons of resources out there to help you build a professional website without needing a deep technical background.
Digging Into the Key Rules and Limitations
A Shopify development store is a fantastic tool, but it's important to remember what it's built for. Think of it as a professional workshop; you have every tool you could possibly need to build something incredible, but it's not the showroom. It’s a private, secure space designed for creation and testing, and its rules are in place to keep it that way. These aren't obstacles—they're guardrails to make sure the environment stays focused on its purpose.
The number one rule is that development stores are strictly for building and testing. You can’t use them to sell to the public. To make sure of this, Shopify automatically password-protects every dev store, keeping your work-in-progress completely private. You also can’t hook up a custom domain name; the store will always live on its default .myshopify.com URL until you transfer it to a client and they pick a paid plan.
App and Billing Specifics
One of the best perks for Shopify Partners is how apps and billing work. You can install any paid app from the Shopify App Store on a development store and test it out without paying a dime. This is your chance to really put an app through its paces, see how it plays with your theme, and make sure it’s the perfect fit before you even think about recommending it to a client.
Billing for the Shopify plan and any apps you've installed only kicks in after the store is handed over to the client and they officially choose their subscription. This risk-free setup is a game-changer for managing project budgets and keeping client expectations in check.
Transaction and Order Limitations
So, how do you test the checkout if you can't sell anything? Simple. Shopify gives you a Bogus Gateway to run test transactions. This lets you simulate the entire customer journey, from adding a product to the cart all the way to the order confirmation page, without any actual money ever changing hands. It’s a complete end-to-end test drive.
To keep the environment purely for development, there are a few other caps in place:
- Test Orders: You have a limit on the number of test orders you can place, just to make sure the system isn't being used for anything other than its intended purpose.
- Product Variants: The limit on product variants is generous, but it's there to reinforce the store's non-commercial status.
These rules ensure the development store remains the perfect staging ground. The incredible growth of Shopify, which saw its Gross Merchandise Volume soar to $292 billion in 2024, is built on a rock-solid platform where new stores can be perfected before they ever go live. This process allows brands to launch without a hitch and join an ecosystem where merchants generated a staggering $9.3 billion in a single BFCM weekend. You can find out more about the platform's amazing scale and how brands are succeeding on Shopify.
Handing Over the Keys to Your Client's New Store
That moment when a project wraps up is always a great feeling. But the final handover is just as critical as any design or development phase. Transferring ownership of a Shopify development store is a clean, simple process you'll manage right from your Shopify Partner Dashboard. This is the step that officially moves the store from your portfolio into your client's hands, letting them pick a paid plan and finally go live.
Think of it like handing over the keys to a newly built house. You've done all the hard work, the final inspections are complete, and now it's time for the owner to move in. Before you start that transfer, it's always a smart move to run one last pre-flight check to make sure everything is absolutely perfect.
Your Pre-Transfer Checklist
A smooth handover saves everyone from post-launch headaches. Before you even think about clicking that "Transfer ownership" button, run through this quick checklist with your client to get their final sign-off. It’s a simple step that makes a huge difference.
- Final Content and Design Approval: Get the final thumbs-up from the client on all page designs, product listings, and copy. Make sure they've reviewed every last detail.
- App Configuration Review: Walk them through all the installed apps. Confirm they're configured correctly and, just as importantly, that the client understands what each one does and any costs that come with them.
- Staff Accounts and Permissions: Has the client added all their team members? Are their permissions set up correctly? Now's the time to check.
- Payment Gateway Setup: This is a big one. Give your client a heads-up to have their payment gateway information ready to go. They'll need to plug it in as soon as they accept ownership.
This final review isn't just a formality. It’s a crucial step that draws a clear line under the project and sets you both up for a successful, long-term partnership. It’s all about making sure there are no surprises after you’ve handed things over.
Kicking Off the Store Transfer
Once all the final checks are ticked off, you're ready to start the transfer from your Partner Dashboard.
- Head to Stores: From your main dashboard, just click on "Stores."
- Pick the Right Store: Find the completed development store on your list that you're ready to hand over.
- Click Transfer Ownership: You’ll see a "Transfer ownership" button right there on the store's page. Click it.
- Pop in the Client's Details: You'll need to enter the client's full name and email address. This person will become the new store owner, the primary contact on the account. You can also add a little personalized message if you like.
- Confirm the Transfer: Give the details one last look-over and hit "Transfer store."
And that's it from your end! Your client will get an email with a link and instructions to accept the transfer and create their account. As soon as they accept, Shopify will prompt them to choose a paid plan and put in their billing info.
The best part? Even after the transfer is complete, you'll automatically keep access as a collaborator. This makes it incredibly easy to jump back in and provide ongoing support or maintenance without any hassle.
Best Practices for Managing Your Development Stores
Once you've got the basics of creating and transferring a dev store down, the real magic happens when you start building professional habits. Mastering the Shopify development store workflow is all about adopting practices that save you time, slash the number of errors, and ultimately lead to a better final product. These strategies are game-changers, whether you're an agency juggling a dozen clients or a merchant carefully testing a new feature.

For agencies, it's all about efficiency. Instead of starting every single project from scratch, create a "starter template" development store. You can pre-install your favorite apps, configure the essential settings you use on every build, and even set up a basic theme structure. This template can then be cloned for each new client, which drastically cuts down on those repetitive, time-consuming setup tasks.
And when it comes to serious development, integrating version control isn't just a nice-to-have; it's non-negotiable.
Using a tool like GitHub to manage your theme code is a total game-changer. It lets you track every single change, work alongside other developers without stepping on each other's toes, and safely roll back to a previous version if an update goes sideways. It's the difference between chaotic file management and a structured, professional workflow.
Strategies for Agencies and Merchants
Optimizing your workflow is just as important for merchants as it is for agencies. For agencies, it means setting up clearer review cycles with clients. For merchants, it's about putting rigorous testing protocols in place to make sure nothing breaks on the live store.
For Agencies:
- Create a Starter Template: Pre-load a dev store with your go-to apps, theme settings, and foundational page layouts. This gets projects off the ground way faster.
- Implement Version Control: Use Git and GitHub to manage theme code. It makes tracking changes and collaborating a breeze.
- Establish Clear Review Processes: Set specific milestones for client feedback. This keeps projects on track and prevents that dreaded scope creep.
For Merchants:
- Mirror Live Store Data: For the most accurate testing environment, you should regularly export products, customers, and settings from your live site to your dev store. When you're building and testing, it's critical to follow best practices that improve ecommerce customer experience.
- Maintain Separate Dev Stores: If you're running complex operations, don't be afraid to use different dev stores for different projects. You might have one for testing international market localizations and another for a major app integration. You can dive deeper into this in our article on how to manage multiple Shopify stores.
This kind of structured approach is what prepares a store to handle the massive traffic spikes that come with success. Just look at Shopify's platform traffic, which hit a peak of 351.5 million visits in early 2026. This shows the kind of volume a store needs to be ready for, especially during those Q4 holiday rushes. With shoppers spending an average of 19 minutes per session, a thoroughly tested store is one that's ready to convert.
Common Questions About Development Stores
When you're diving into the world of Shopify development stores, a few questions always pop up. Getting straight answers is key for everyone involved—from agencies building sites to merchants getting ready to launch. Let's clear up the most common queries we run into.
Can I Sell Products on a Development Store?
The short answer is no. Development stores are sandboxes built exclusively for creating and testing, not for actual sales. You can't connect a live payment gateway to process real orders.
However, Shopify provides a "Bogus Gateway" for a reason. It lets you run test transactions and simulate the entire checkout experience from start to finish, all without any real money changing hands. To start selling to actual customers, the store needs to be transferred to a client, who then picks a paid Shopify plan.
Do Shopify Development Stores Expire?
Here’s one of their best features: they do not expire. As long as you're a Shopify Partner, any development store you create will stick around indefinitely.
This makes them incredibly useful for long-term projects or as a permanent staging environment. You can test major theme updates, new apps, or design changes for an existing live store without ever feeling rushed by a ticking clock.
Think of it like this: a standard free trial is a quick, 3-day test drive for a merchant. A development store, on the other hand, is the permanent, professional workshop where partners build and fine-tune the car before handing over the keys.
How Can I Copy My Live Store to a Development Store?
You absolutely can, and it's a practice we highly recommend. The easiest way is to use Shopify's built-in import/export tools to move your data—like products, customers, and order history—over using CSV files. Just export the data from your live store and import it into your new dev environment.
Creating a mirror of your live store like this is a game-changer for accurate testing. It allows you to check:
- Theme Edits: See exactly how a new layout or feature looks with your real product catalog.
- App Integrations: Make sure that new app you're considering plays nice with your existing data and setup.
- Performance Checks: Test your site speed with a full-scale product load, not just a handful of test items.
Ready to build, test, and grow without limits? The expert team at ECORN specializes in Shopify development, design, and CRO to help your brand scale effectively. Start your project with us today and see how our flexible solutions can bring your eCommerce vision to life.


Conversion Rate Optimisation Australia: Boost Your Sales
Conversion Rate Optimization AI: Your Shopify Store Guide

10 Product Bundling Strategies for Shopify in 2026
How to Increase Customer Lifetime Value: A Shopify Playbook
AI Customer Service Automation: Shopify Guide 2026
Clean Website Design: A Shopify Conversion Playbook

Omnichannel Retail Strategy: A Shopify Playbook
Product Data Enrichment: A Guide for Shopify Brands
Instagram Shopping Features a Guide for Shopify Stores

What Is Revenue Optimization: A Holistic RevOps Guide
Benefits of Conversion Rate Optimization: Boost Your
WordPress to Shopify Migration: Your 2026 Seamless Switch
Boost Sales: Ecommerce Payment Processing Guide 2026
Unified Commerce Platform: Benefits, KPIs & Shopify Guide

How to Reduce Bounce Rate eCommerce: Your 2026 Guide
Shopify API Integration: A Practical End-to-End Guide

How to Implement Data Governance: A 2026 Guide
Shopify Store Development Cost: A 2026 Breakdown
What Is Server Side Tracking: The Shopify Guide 2026
Marketing Automation Workflows: A Shopify Guide for 2026
Shopify: How to Reduce Technical Debt

Shopify UX Design Change: A Playbook for Growth
User Generated Content Strategy: Shopify Playbook

Shopify Pause and Build Plan Cost: A Complete 2026 Guide
Compare at Price on Shopify: A Complete Guide for 2026
Where Can I Sell My Prints? 10 Best Platforms for 2026
Shopify Order Management System: The Ultimate Guide 2026
What Is Marketing Attribution? an eCommerce Guide for 2026

10 Best Black Friday Sales Sheets for 2026

Discover the Top Social Media Marketing Agencies For
Consumer Confidence Definition for eCommerce in 2026
What Is Social Commerce? Your 2026 Guide to Boosting Sales
A Social Ad Campaign Playbook for eCommerce Growth
7 Best FAQ Page Examples for SaaS & eCommerce

Market Research in Fashion Industry: A Guide for Shopify
Shopify Migration Services: Expert Guide for 2026
Mastering FB Retargeting Ads for Shopify in 2026
What Is Omnichannel Ecommerce
Master Your Shopify Plus Migration: The 2026 Guide
Shopify Integration Services: A Merchant's 2026 Guide
Shopify Collection Description: A Guide to SEO & Sales
Shopify Plus Contact: Reach Sales & Support Effectively

Top Luxury Shopify Stores: Design & UX Strategies
How to Improve Customer Experience: A Shopify Roadmap
Creative Facebook Ads: 10 Examples for Shopify Brands

Remarketing with Facebook Ads: A Shopify Guide for 2026

SEO Linking Strategies for Shopify Stores
Top 7 Statistics YouTube Channels for eCommerce in 2026

Hiring Shopify Plus Designers: A Founder's Guide

Shopify Product Variation: Master Your Variants for 2026

Leverage Ai Solutions Brands: Your 2026 Shopify Growth Guide
Filters in Shopify: A Guide for Growing Brands

Shopify Plus Developer: A Guide for Growing Brands

When Does Black Friday Online Start? A 2026 Guide
Black Friday Email Marketing: Shopify & Klaviyo Guide

Polaris Design System: The Complete Shopify Guide

How to Hire a Consultant Email Marketing Expert

What Is Q4? A Shopify Merchant's Guide to Peak Season

Marketing Organization Structure for eCommerce Growth

Top Account-Based Marketing Agency Guide for 2026

7 Remarketing Ad Examples for Your 2026 Campaigns

AI Retail Solutions: Boost Your Shopify Store

Migrate to Shopify: The Definitive 2026 Guide
Shopify Authentication App: A Guide for Secure Stores

Why Strategic Marketing Is Important for Growth in 2026
How to Create a Size Chart in Shopify: 2026 Guide

Shopify Themes for Jewelry: The Definitive 2026 Guide

Minimal Shopify Templates: Faster, Higher-Converting Stores
Maximize Profit: Shopify CC Fees 2026 Guide

Best Shopify Apps for Beginners in 2026

How to Improve Online Shopping Experience in 2026

Shopify Design and Development Services: A 2026 Guide

Small Business Social Media Marketing Agency: A Hiring Guide
Bulk Edit Shopify: A Guide to Save Hours on Store Updates

2026 Trends in Food and Beverage Industry

Post Purchase Survey Guide for Shopify Stores

How to Build an Ecommerce Brand in 2026
Conversion Rate Optimization for Ecommerce: Maximize Profit
How to Use Customer Data to Increase Sales: A Guide

Shopify for Enterprise: The 2026 Deep Dive Guide

Email Marketing Agencies: The Guide for Shopify Brands
Boost Sales With The Right Shipping Shopify App
Your Guide to the Shopify Site Map

7 Headless Commerce Examples for 2026

Mastering Trends in Cosmetic Industry for 2026
Transfer Shopify to BigCommerce The Complete 2026 Playbook

What Is Shopify Collective? Your 2026 Guide to Success
Unlock Shopify Growth with Site Link SEO

Integrating Shopify and WordPress A Complete Guide for 2026

Naming a Clothing Store: A Shopify Founder's Playbook

Guide to buying shopify store in 2026

Buying shopify store: Buying a Shopify Store: Invest Wisely

Food & Beverage Marketing: A Complete Guide for 2026
Facebook Ads Agency: A Shopify Brand's Hiring Guide

Shopify Apparel Stores: A 2026 Launch & Scale Guide
How to Deactivate Shopify Store: The 2026 Guide

Shopify and Square: The 2026 Ultimate Comparison

Your Guide to Beauty Products Ecommerce

A Guide to Marketing for Beauty Brands in 2026
Your Guide to Facebook Black Friday Ads


newsletter in your inbox